> ## Documentation Index
> Fetch the complete documentation index at: https://tutorials.spellslate.com/llms.txt
> Use this file to discover all available pages before exploring further.
# Tagging elements in a script breakdown
# Tagging elements in a script breakdown
Breakdown elements like characters, locations, props, costumes, vehicles, and more are linked to your script so you can see where they appear.
## Where to tag
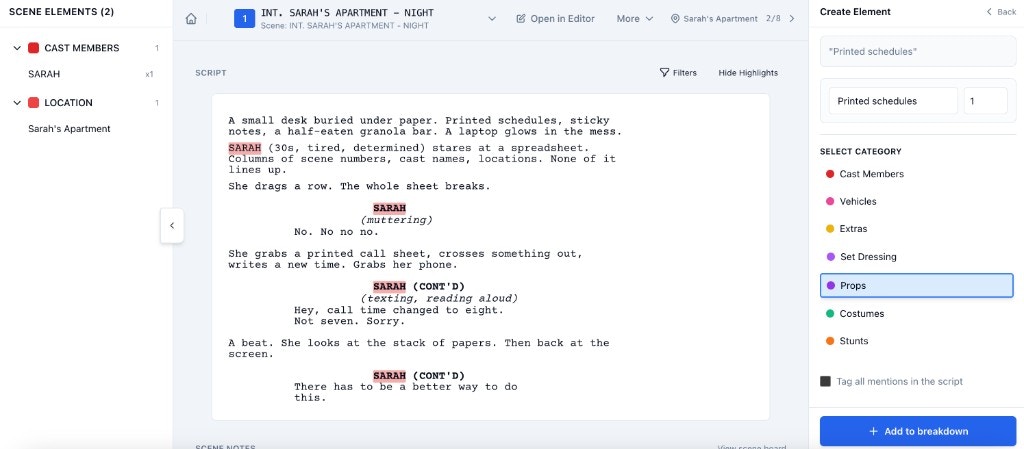
Open a scene from the **Breakdown** tab by clicking a scene row. The scene breakdown page shows:
* **Left:** Scene elements sidebar (cast, props, costumes, and other items in this scene)
* **Center:** Script text
* **Right:** Add Element panel
 ## How to add elements
1. Click a scene in the Breakdown tab to open it.
2. Select text in the script (e.g. "shotgun" in an action line).
3. The right panel changes to **Create Element**.
4. Choose a category (Props, Costumes, Vehicles, etc.) in the Add Element panel.
5. Click **Add to breakdown** (or **Add Element**).
You can also click **Add Element** without selecting text, enter the name, choose a category, and add it.
**Tip:** Use **Tag all mentions in the script** to add the same element everywhere it appears in one step.
## Extras quantity and roster
For **Extras**, the quantity field is saved on the element itself. Example: `zombies` with quantity `3`.
* Breakdown stores one extras element with the required headcount.
* The extras board auto-creates matching extra cards for that quantity.
* Roster progress is shown in the extras roster UI (`filled/quantity`, like `0/3`).
* Quantity increases add new placeholder slots and cards.
* Quantity decreases do not auto-delete existing cards. You can keep existing assignments and work from an over-target state.
## Reviewing your elements
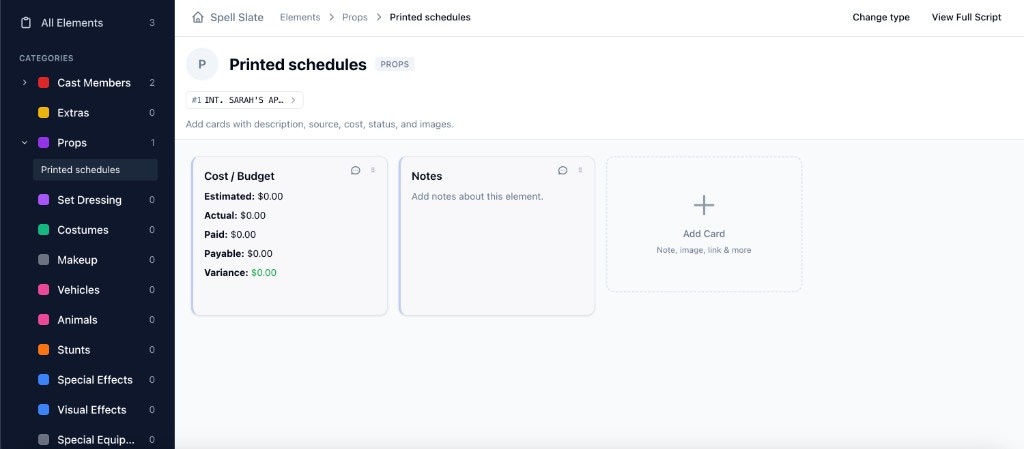
Each category (Props, Costumes, Characters, Locations, etc.) is available from the Breakdown sidebar. From there you can see which scenes use each element and change categories if needed. If you tagged something as the wrong type (e.g. Prop instead of Set Dressing), use [How to change element type](/how-to-change-element-type).
## How to add elements
1. Click a scene in the Breakdown tab to open it.
2. Select text in the script (e.g. "shotgun" in an action line).
3. The right panel changes to **Create Element**.
4. Choose a category (Props, Costumes, Vehicles, etc.) in the Add Element panel.
5. Click **Add to breakdown** (or **Add Element**).
You can also click **Add Element** without selecting text, enter the name, choose a category, and add it.
**Tip:** Use **Tag all mentions in the script** to add the same element everywhere it appears in one step.
## Extras quantity and roster
For **Extras**, the quantity field is saved on the element itself. Example: `zombies` with quantity `3`.
* Breakdown stores one extras element with the required headcount.
* The extras board auto-creates matching extra cards for that quantity.
* Roster progress is shown in the extras roster UI (`filled/quantity`, like `0/3`).
* Quantity increases add new placeholder slots and cards.
* Quantity decreases do not auto-delete existing cards. You can keep existing assignments and work from an over-target state.
## Reviewing your elements
Each category (Props, Costumes, Characters, Locations, etc.) is available from the Breakdown sidebar. From there you can see which scenes use each element and change categories if needed. If you tagged something as the wrong type (e.g. Prop instead of Set Dressing), use [How to change element type](/how-to-change-element-type).
 ## Scene notes
On each scene's breakdown page, the **Scene Notes** area below the script lets you add production notes for that scene.
## Scene notes
On each scene's breakdown page, the **Scene Notes** area below the script lets you add production notes for that scene.
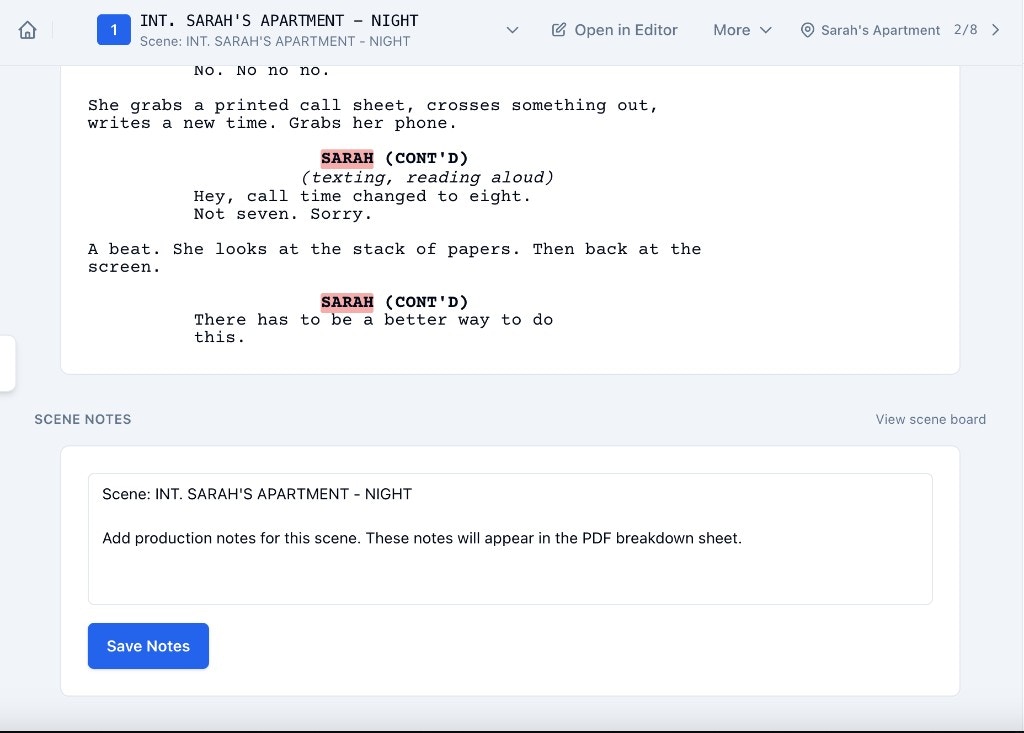 Use it for props, wardrobe, technical notes, or other reminders. Notes are saved to the scene board's Production Notes card and appear in the breakdown PDF. Use **Bold**, **Italic**, and **Underline** on selected text if needed. The **View scene board** link opens the full board for that scene.