Managing makeup and hair
A cut that’s fresh in scene 12 has to be healing in scene 30, and the braid she wears at the dock has to come back after the dinner scene. Tag each makeup and hair element in the script, tie it to the character who wears it, and group elements into looks so the chair knows what goes on every actor in every scene. In the project nav, click Breakdown, then Elements. Under Makeup & Hair, click Open hub.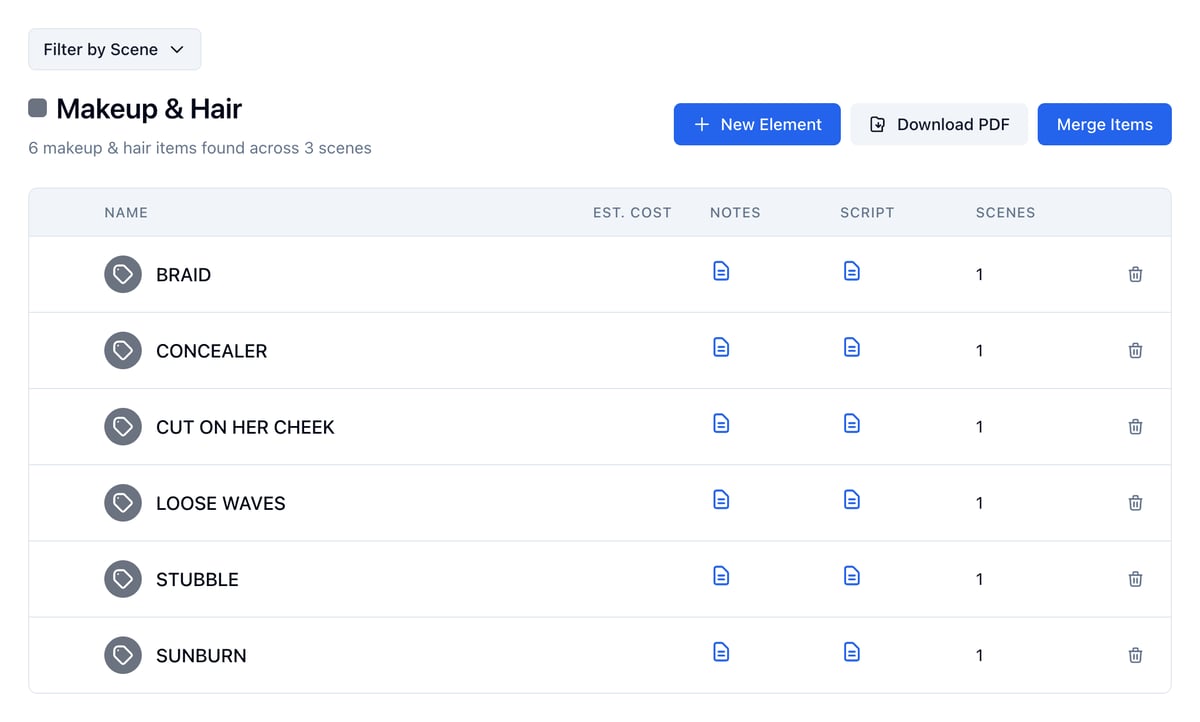
Tag makeup or hair from the script
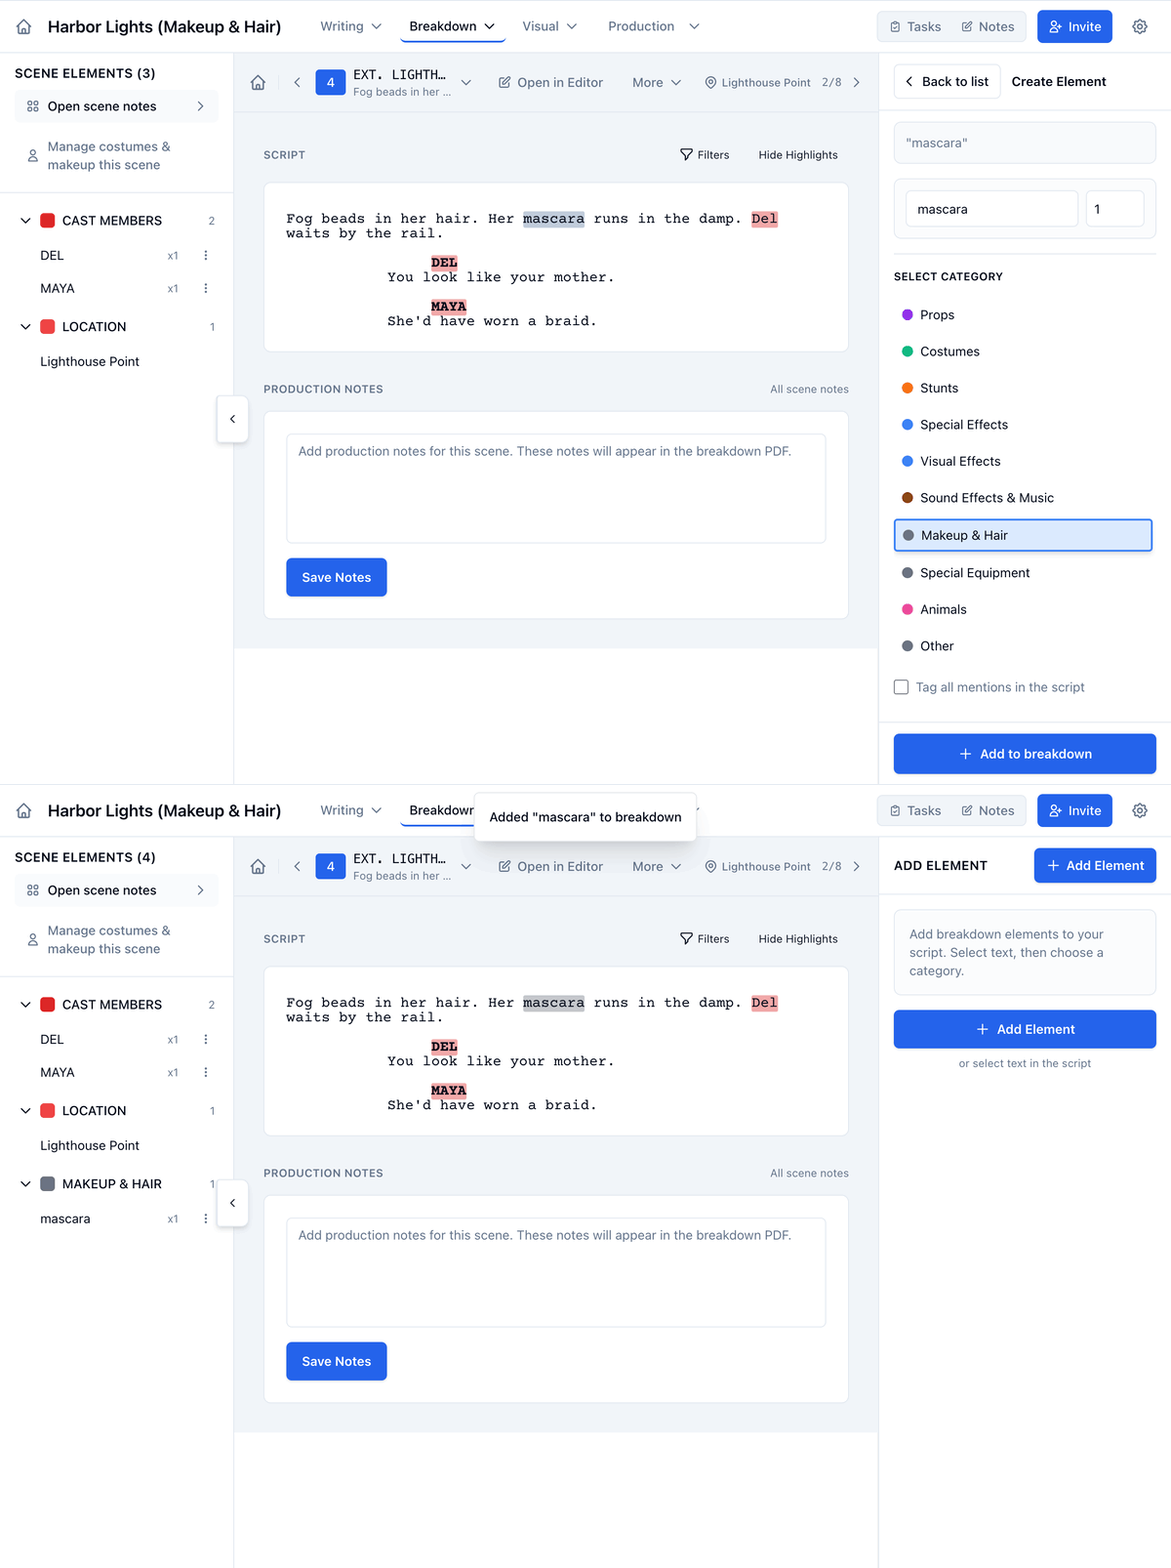
- Open Breakdown and click the arrow in a scene’s Breakdown column.
- In the script, select the words for the element, like mascara.
- In the panel on the right, under Select Category, click Makeup & Hair.
- Click Add to breakdown.
Link makeup or hair to a character
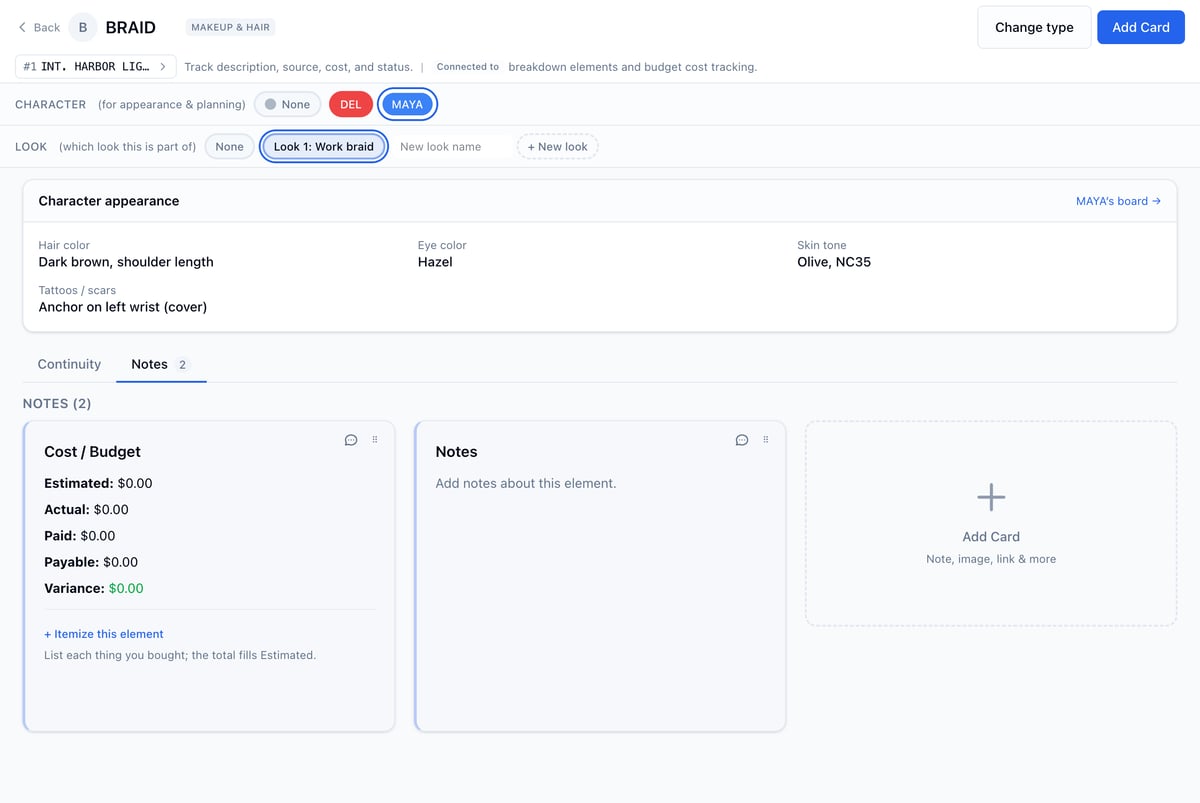
Open the element’s board from the Makeup & Hair list. Next to Character, click the character who wears it. The characters in the element’s scene are listed first; pick anyone else from Other character.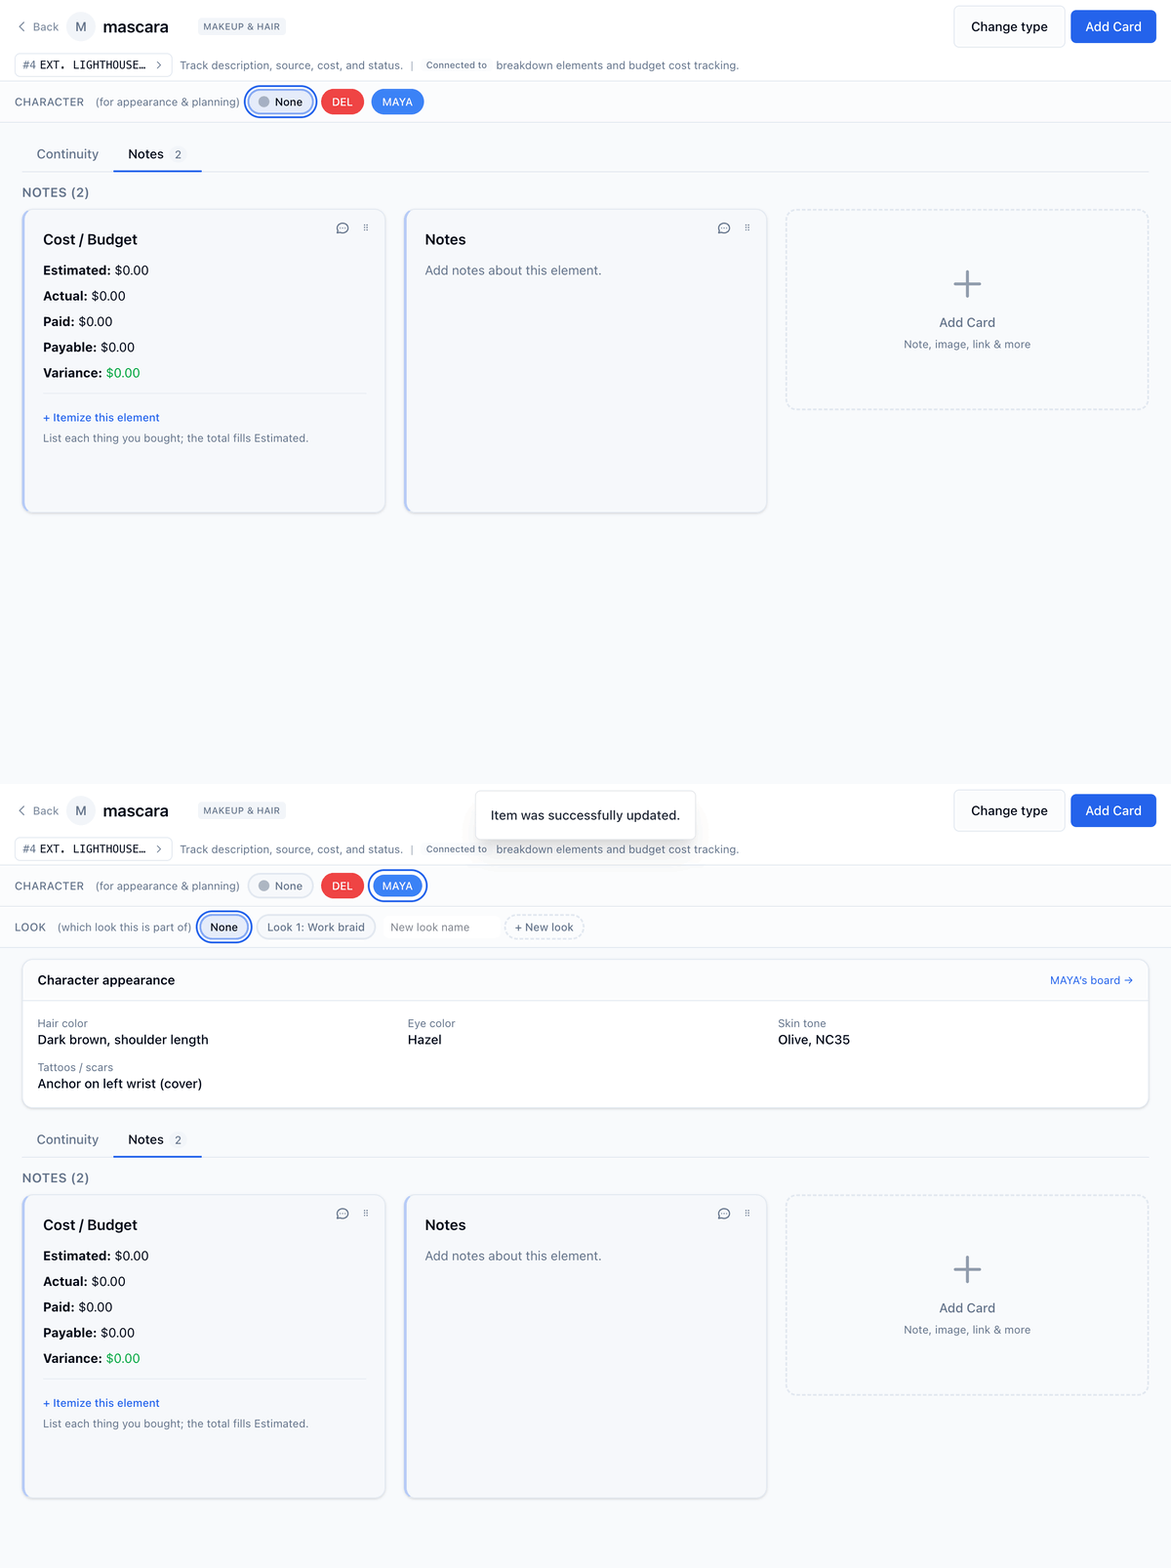
Group elements into a look
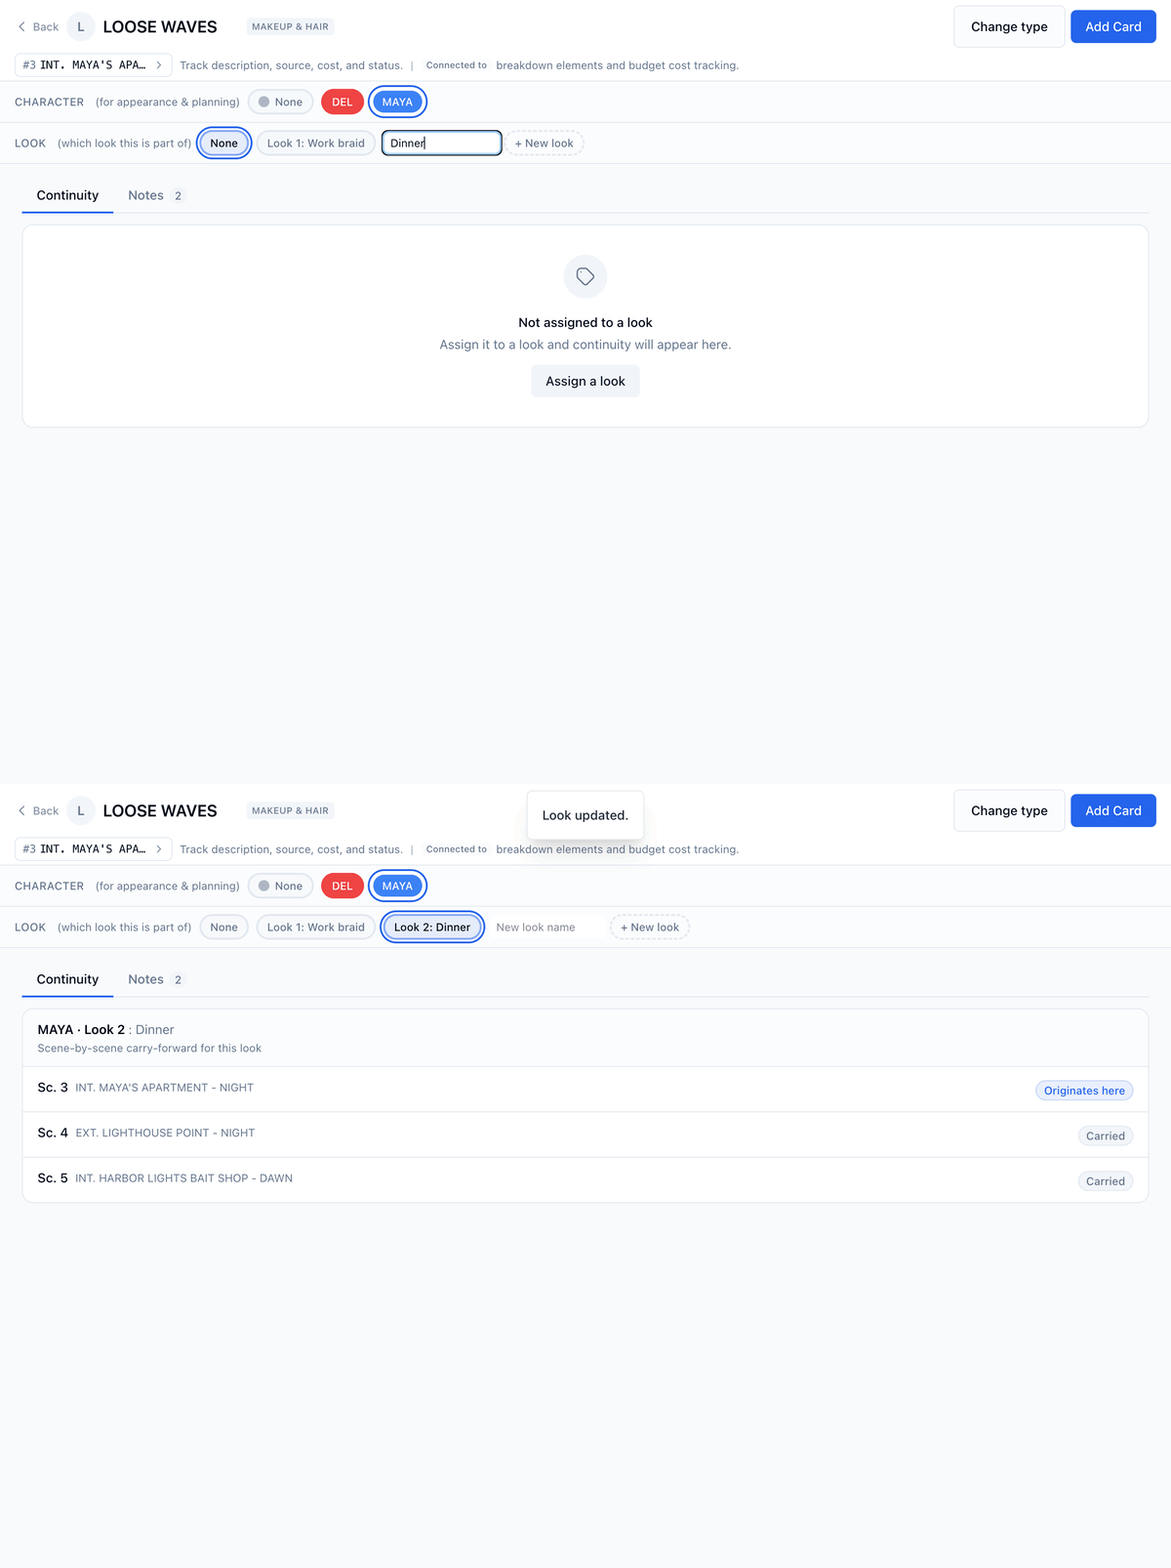
A look is everything on one character at once: the braid, the cut, the concealer over it. Once an element is linked to a character, the board shows a Look row. To start a new look:- Open the element’s board.
- Type a name in New look name, like “Dinner”.
- Press Enter, or click + New look.
Delete a look
- Open any element’s board for that character.
- In the Look row, click the × next to the look.
- Click OK to confirm.
Pick a character’s look in a scene
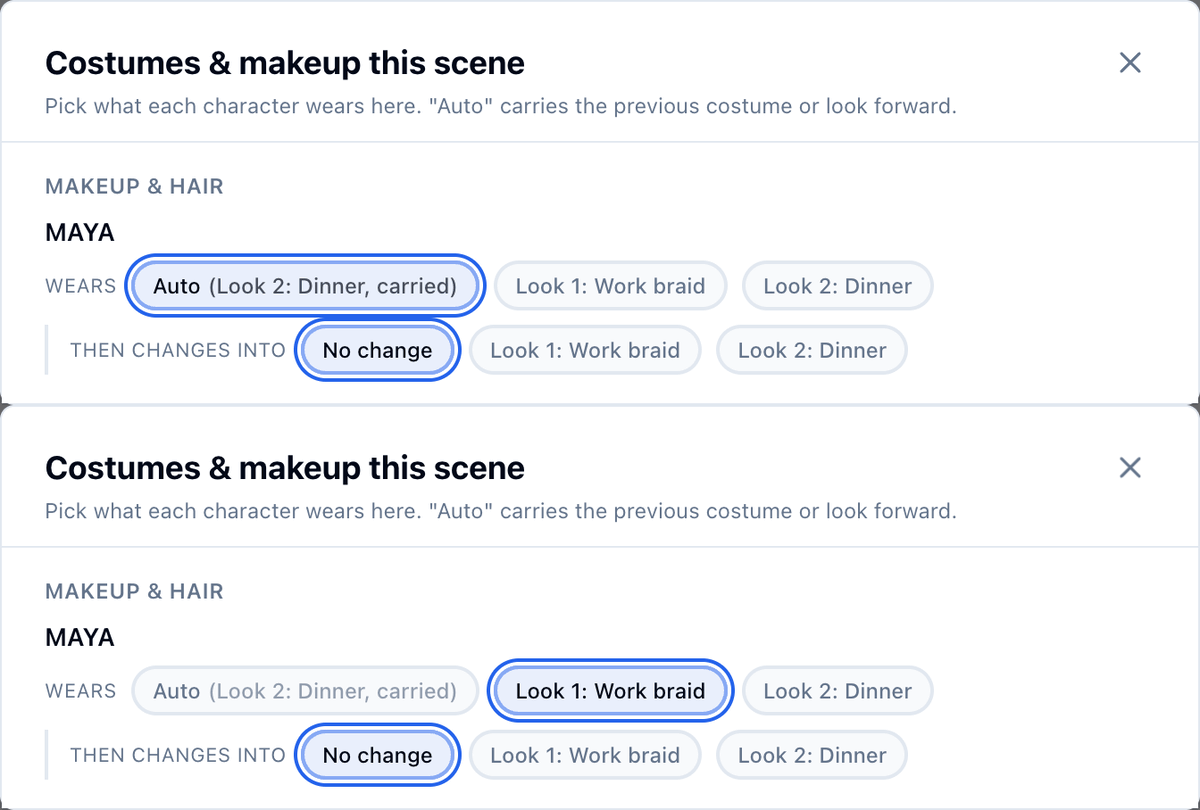
A look carries forward until the character’s next look. When a character goes back to an earlier look, set it in that scene.- Open the scene’s breakdown page.
- In the sidebar, click Manage costumes & makeup this scene.
- Under Makeup & Hair, next to Wears, click the look they’re in.
Change looks partway through a scene
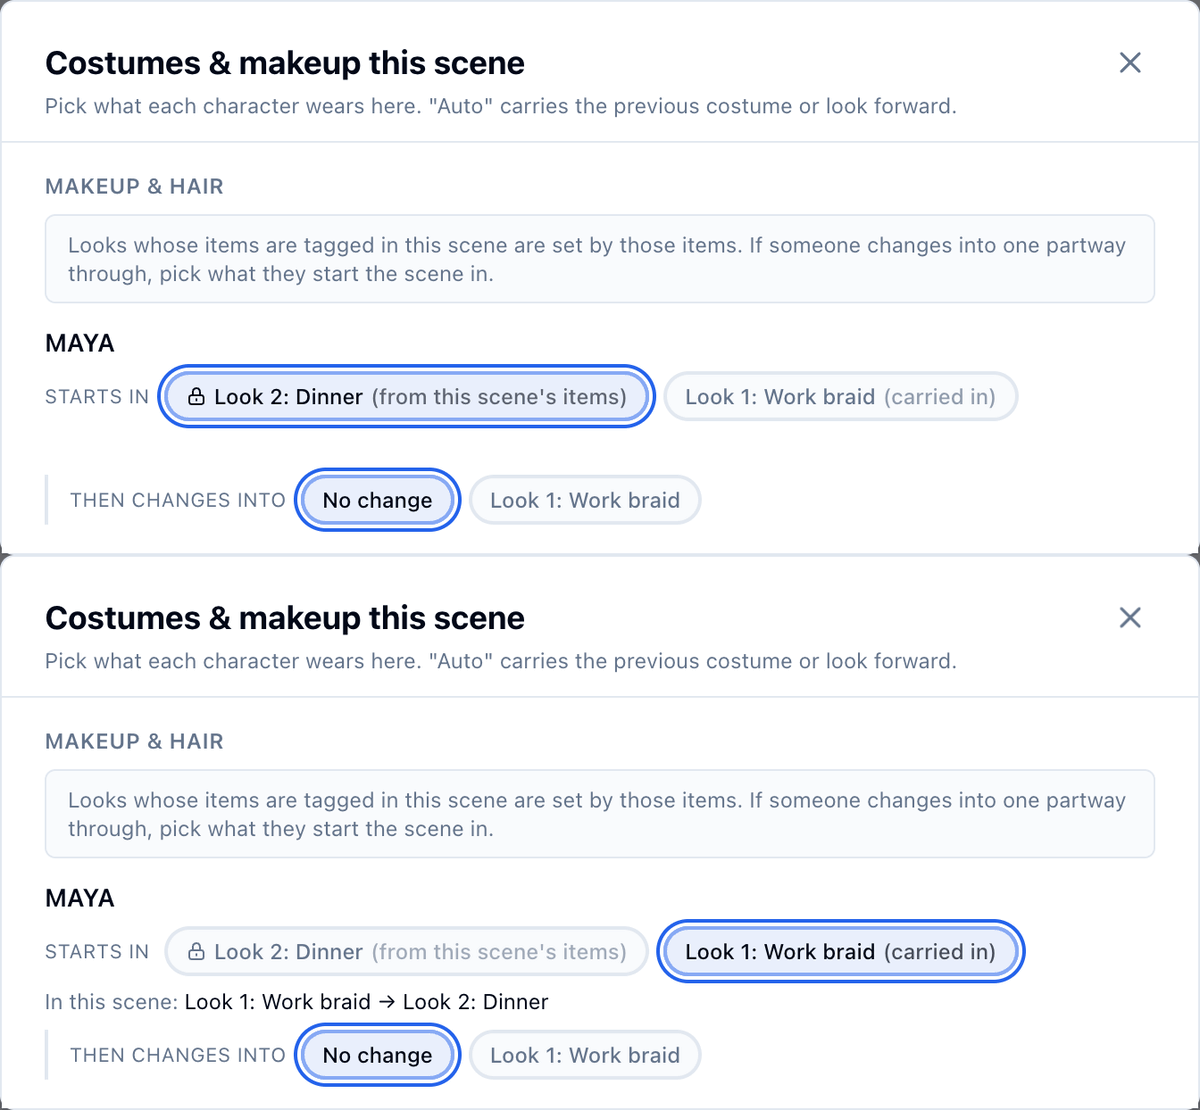
A character can start a scene in one look and end it in another: hair comes down, makeup runs, a wound gets dressed. The look they end in carries into the next scenes. When the new look is tagged in this scene:- Tag the new look’s elements in the scene and put them in a new look, like “Dinner”.
- In the sidebar, click Manage costumes & makeup this scene.
- Under Makeup & Hair, next to Starts in, click the look they start the scene in.
- In the sidebar, click Manage costumes & makeup this scene.
- Under Makeup & Hair, next to Then changes into, click the look they change into.
Example: Maya lets her hair down
Maya wears her work braid at the bait shop and the dock in scenes 1 and 2. In scene 3 she lets the braid down into loose waves and covers the cut on her cheek for dinner.- In scene 3, tag loose waves and concealer and put them in a new look, “Dinner”.
- Open Manage costumes & makeup this scene.
- Under Makeup & Hair, next to Starts in, click Look 1: Work braid (carried in).
Example: a flashback or a daydream
Flashbacks and daydreams put a character in a different look, then return them to their main one. Mark the look so it never carries forward:- Tag the flashback look’s elements in its scene and put them in their own look, like “Teenage Maya”.
- On one of those elements’ boards, in the Look row, tick Flashback or daydream next to the look.

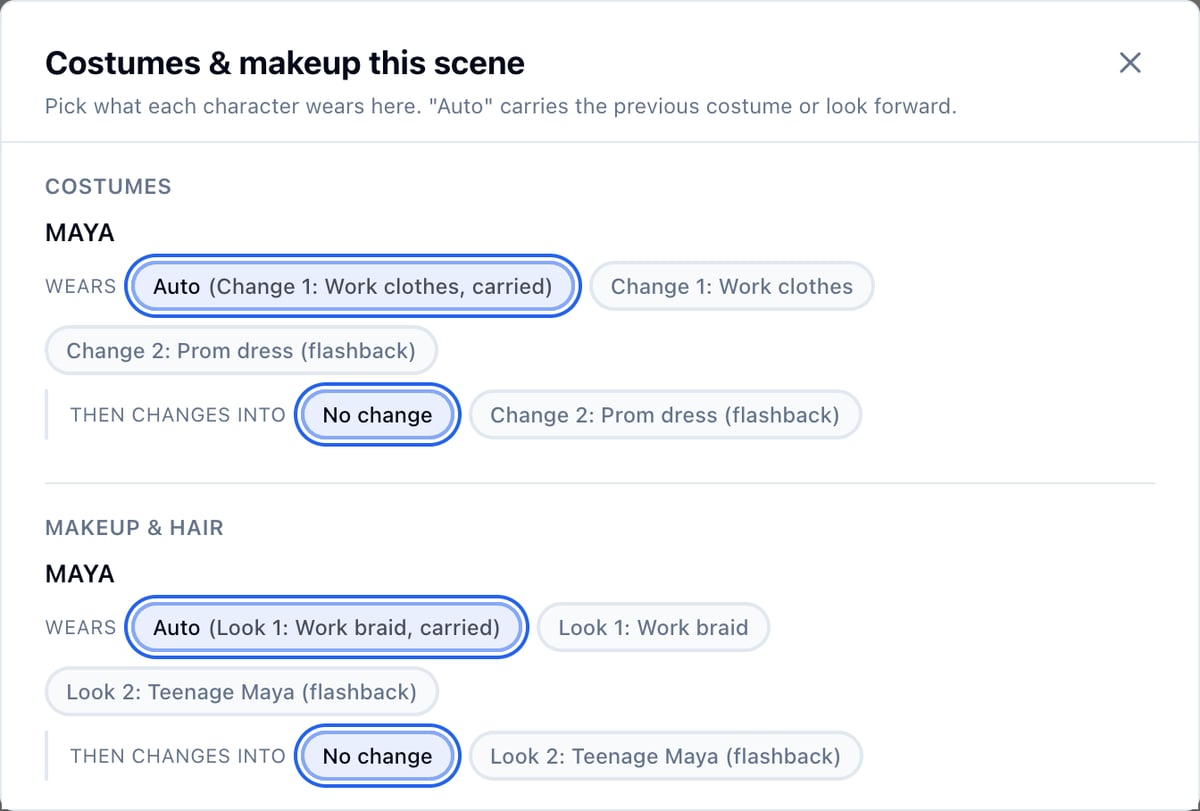
- Open Manage costumes & makeup this scene.
- Under Makeup & Hair, next to Starts in, click the main look.
See all of a character’s looks
On the character’s board, click the Costumes tab. Makeup and hair looks are listed there with the character’s costume changes, each marked Makeup & Hair, with the elements not in a look under Unassigned. Click View board to open any of them.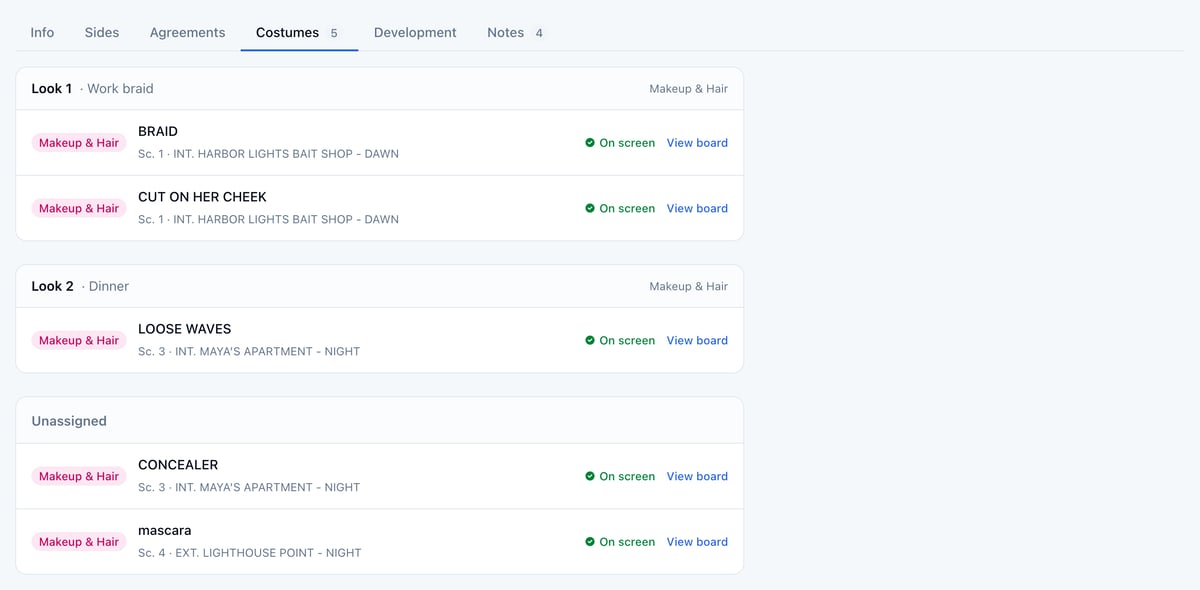
Add a Specifications card
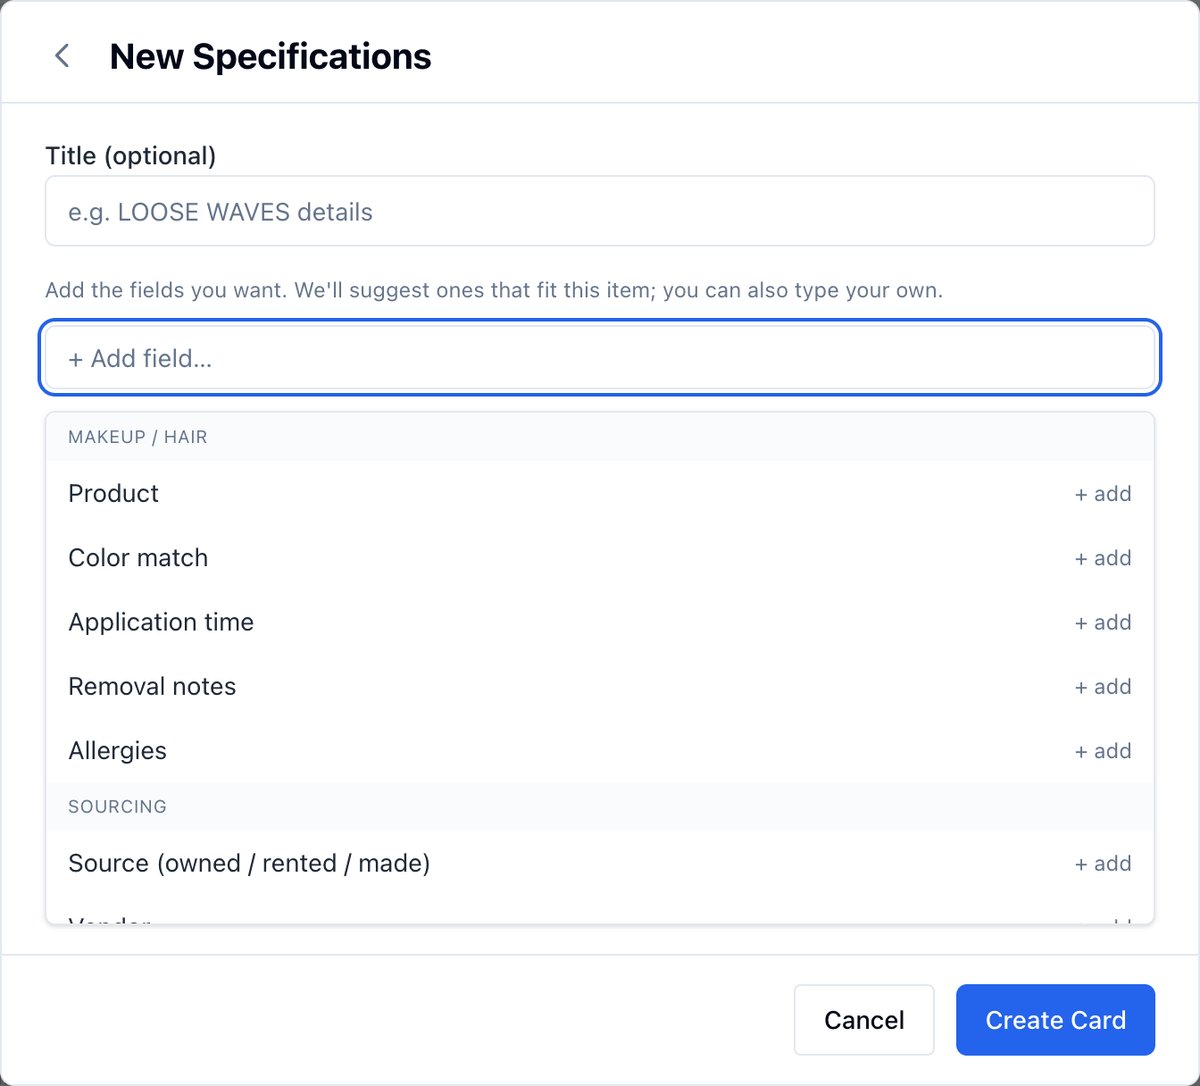
- On the element’s board, click Add Card.
- Click Specifications, then Continue.
- Click + Add field… and pick a field, like Product.
- Type its value.
- Repeat for each field you want, then click Create Card.
Track what makeup and hair costs
Open the element’s board and click the Notes tab. On the Cost / Budget card, type the Estimated amount. To list each thing you bought instead, click + Itemize this element and add line items; their total fills Estimated. See Line items and board sync and Budget.Print makeup and hair continuity
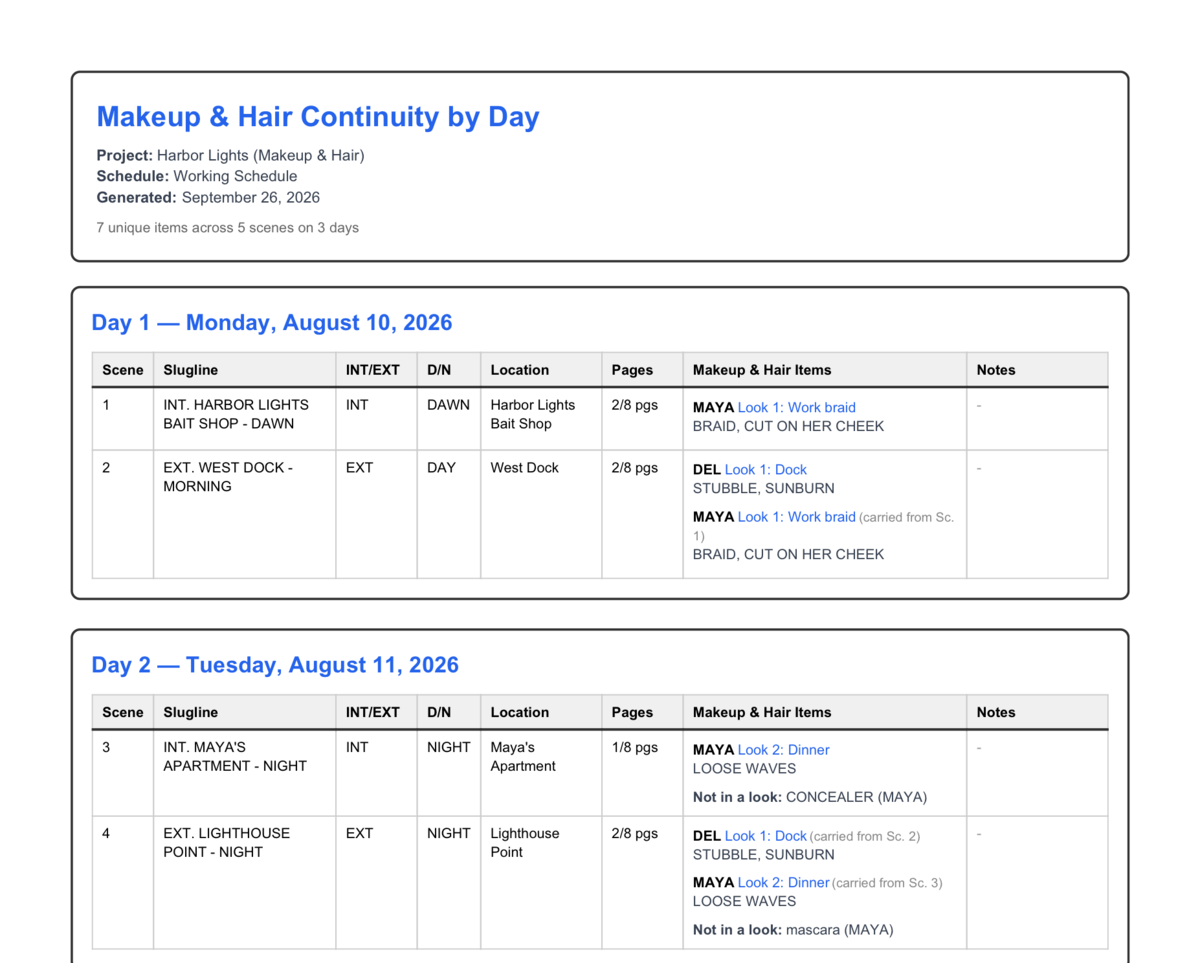
The Makeup & Hair Continuity PDF lists each shoot day’s scenes with the look every character is in and where it carried from. Elements tagged in a scene but not in a look are listed under Not in a look.- From Breakdown, open Reports and click Makeup & Hair Continuity under Schedule.
- From the schedule, click Export, then Makeup & Hair Continuity.
- From a day’s board, click Makeup & hair continuity for that day only.