

Stripboard and shoot days
The stripboard is the shooting schedule. Each scene is a strip, and a day break under a run of strips makes them one shoot day, with its date and call. Move strips around until the days work, and call sheets, sides, and reports follow. In the project nav, click Production, then Schedule. Click a schedule to open its stripboard. After your script is parsed, the project has a Working Schedule with every scene on it.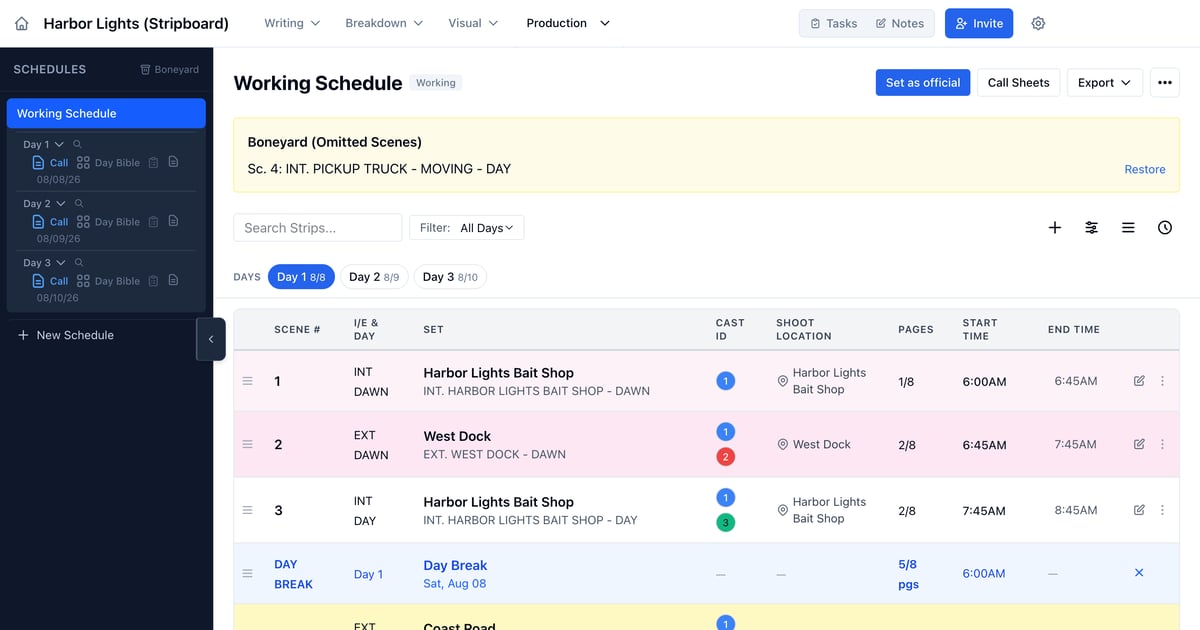
Read a strip
Each strip shows the scene number, INT/EXT and time of day, the set, the cast IDs, the shoot location, and the page count. Strips are colored by INT/EXT and time of day.- Click the set to read the scene.
- Click the cast IDs to change who is in the scene.
- Click the pencil to open the scene in the script editor.
Jump to a day
The Days bar above the board has a chip for each day, with its date. It stays pinned while you scroll, and the day on screen stays highlighted. Click a chip to scroll to that day.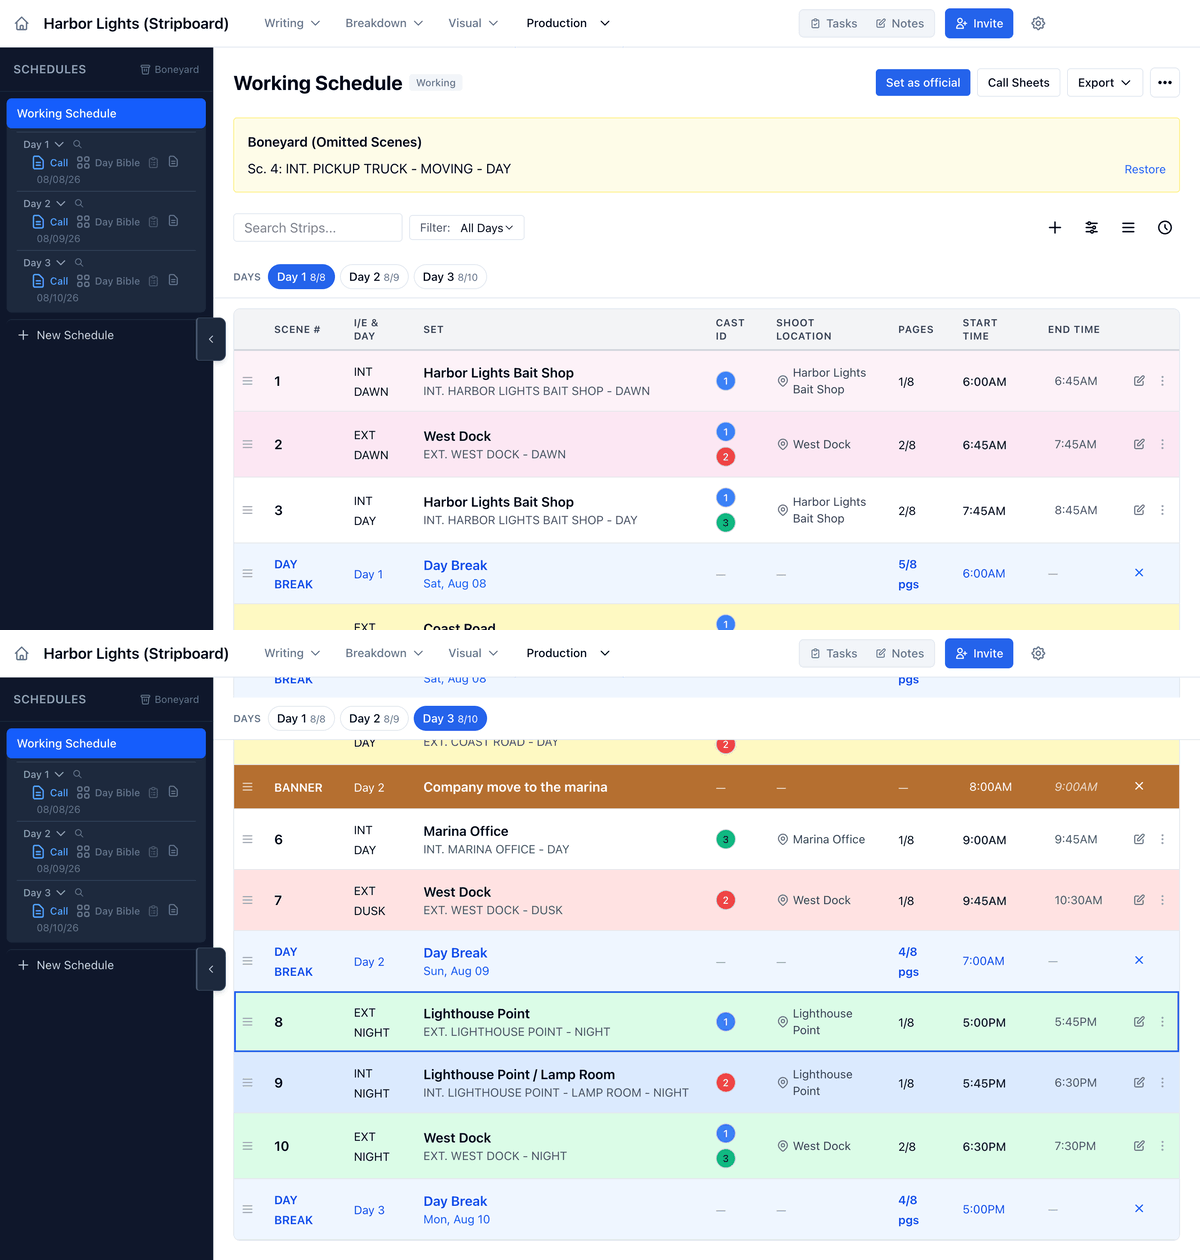
Find strips
Type in Search Strips to find scenes by number, set, heading, location, or cast name, like maya for every scene she’s in. To see one day, pick it under Filter. Above and Below add that many days before and after it, for a look at the days around it.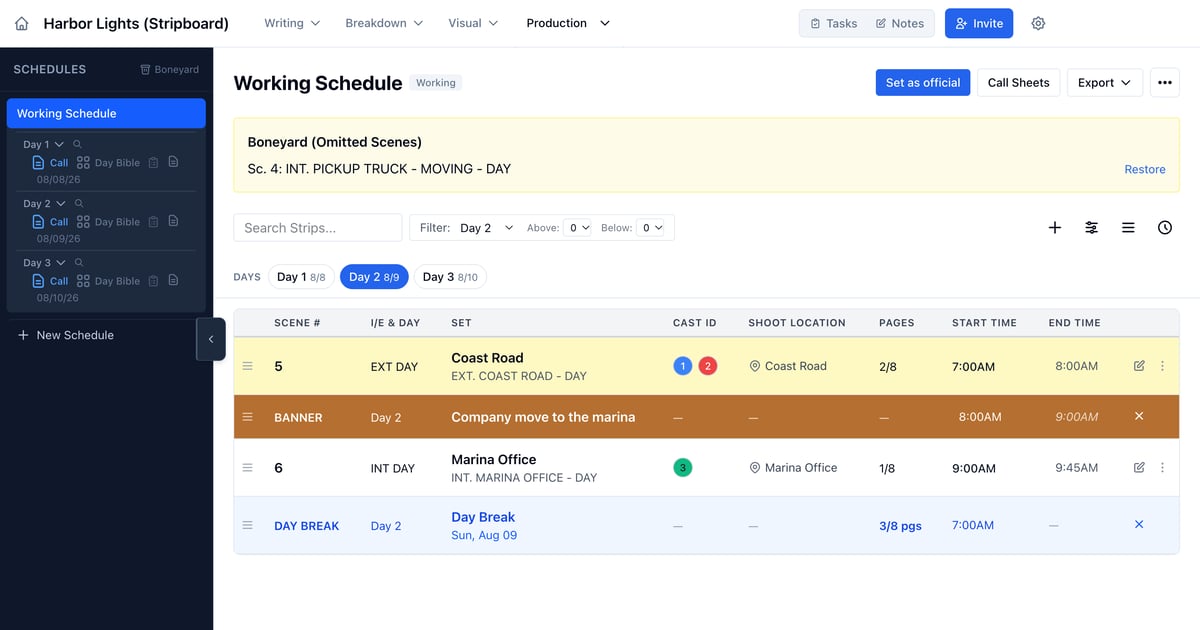
Add day breaks
To add one day break:- Click the three-dot menu on a strip, then Insert Day Break Under or Insert Day Break Above.
- Optional: add a description and the new day’s shoot date.
- Click Add Day Break.
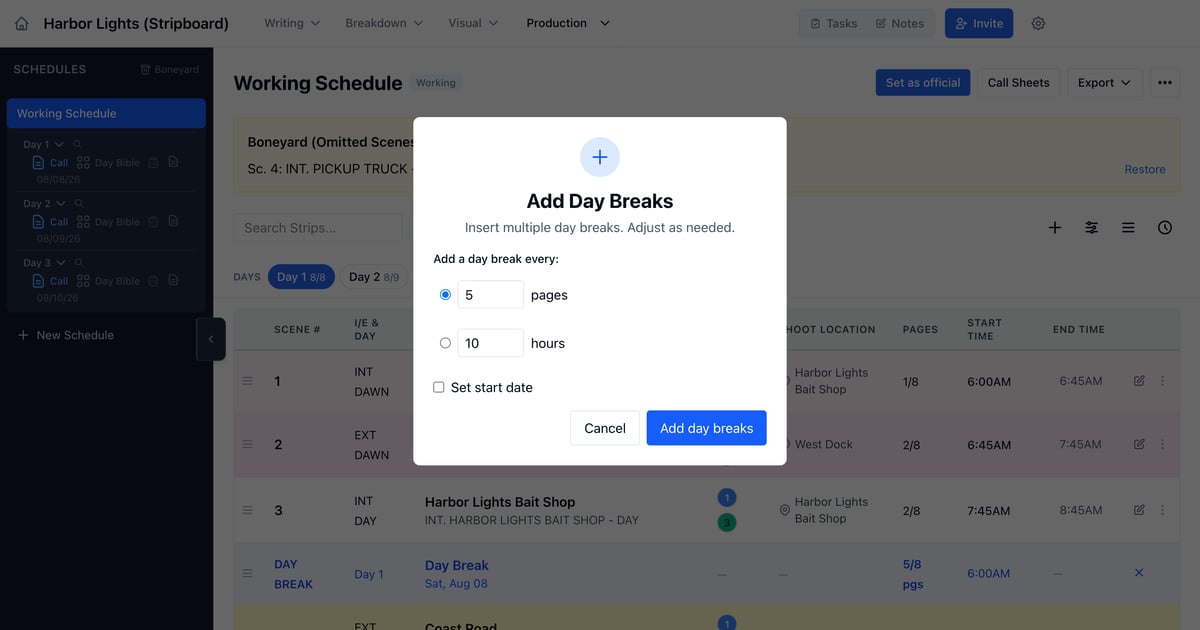
- Click the + in the stripboard toolbar (Add Day Breaks).
- Choose a day break every so many pages or hours.
- Optional: check Set start date to date the days as they’re added.
- Click Add day breaks.
Name a day
Click Day Break on a day break row and type a name, like “Bait shop and dock”. Press Enter to save.Set a day’s date and call
On a day break row, click the date (or Date TBD) and pick the shoot date. You can also set it from the date under the day in the sidebar. The day break’s Start Time is the day’s call. The day’s first strip is suggested to start at it.Move a scene to another day
Drag a strip up or down to reorder it, within a day or into another one. On a long board, the strip menu is faster:- Click the three-dot menu on the strip.
- Under Move to day, click the day. The strip’s own day is marked current.
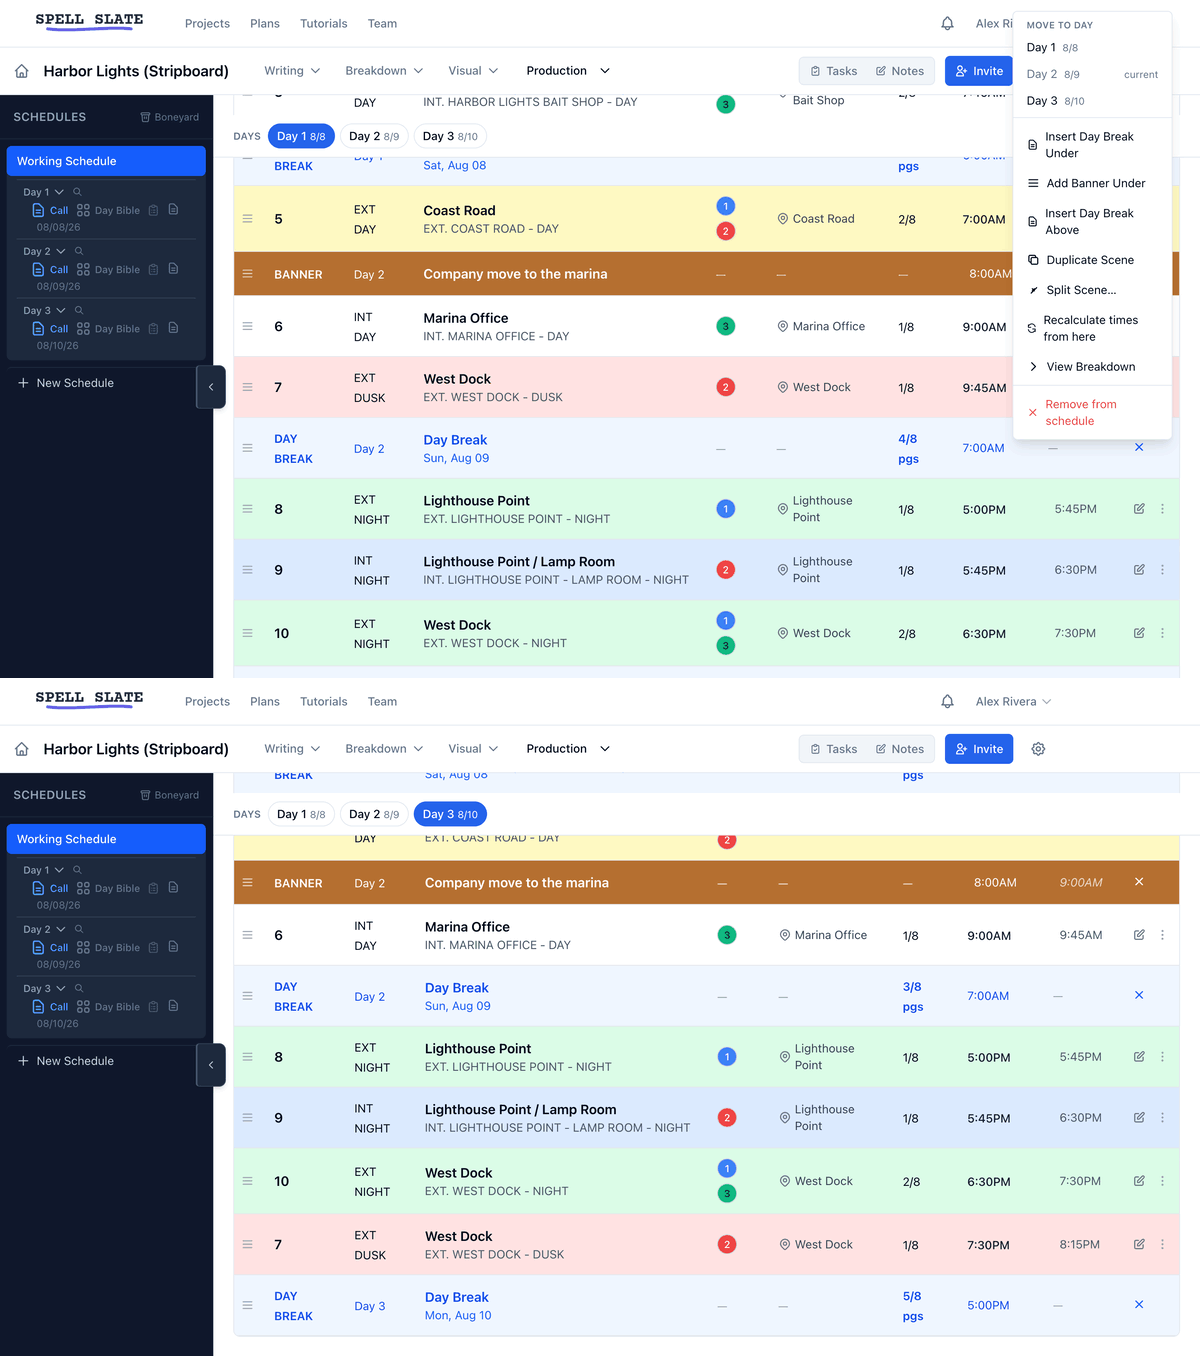
Strip menu
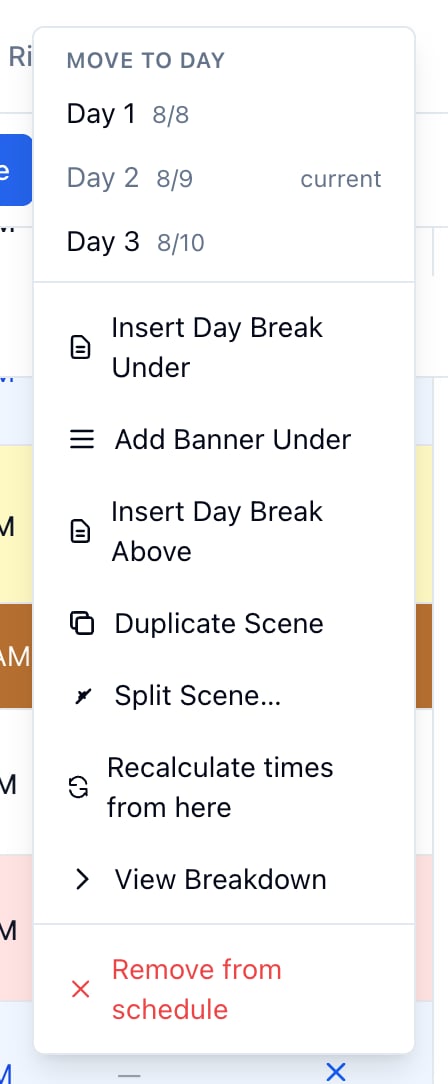
- Move to day: send the scene to the end of another shoot day.
- Insert Day Break Under / Insert Day Break Above: start a new shoot day.
- Add Banner Under: add a label row, like a company move or a meal. Banners take start and end times too.
- Duplicate Scene: put a second strip for the scene right under it, starting when the original ends, for a scene shot on two days. Later strips keep their times.
- Split Scene…: cut one scene into several strips (see below). Revert split puts them back together.
- Recalculate times from here: recompute start and end times from this strip to the end of the day.
- View Breakdown: open the scene’s breakdown page.
- Remove from schedule: take the strip off this board. The scene stays in your script.
Add a banner
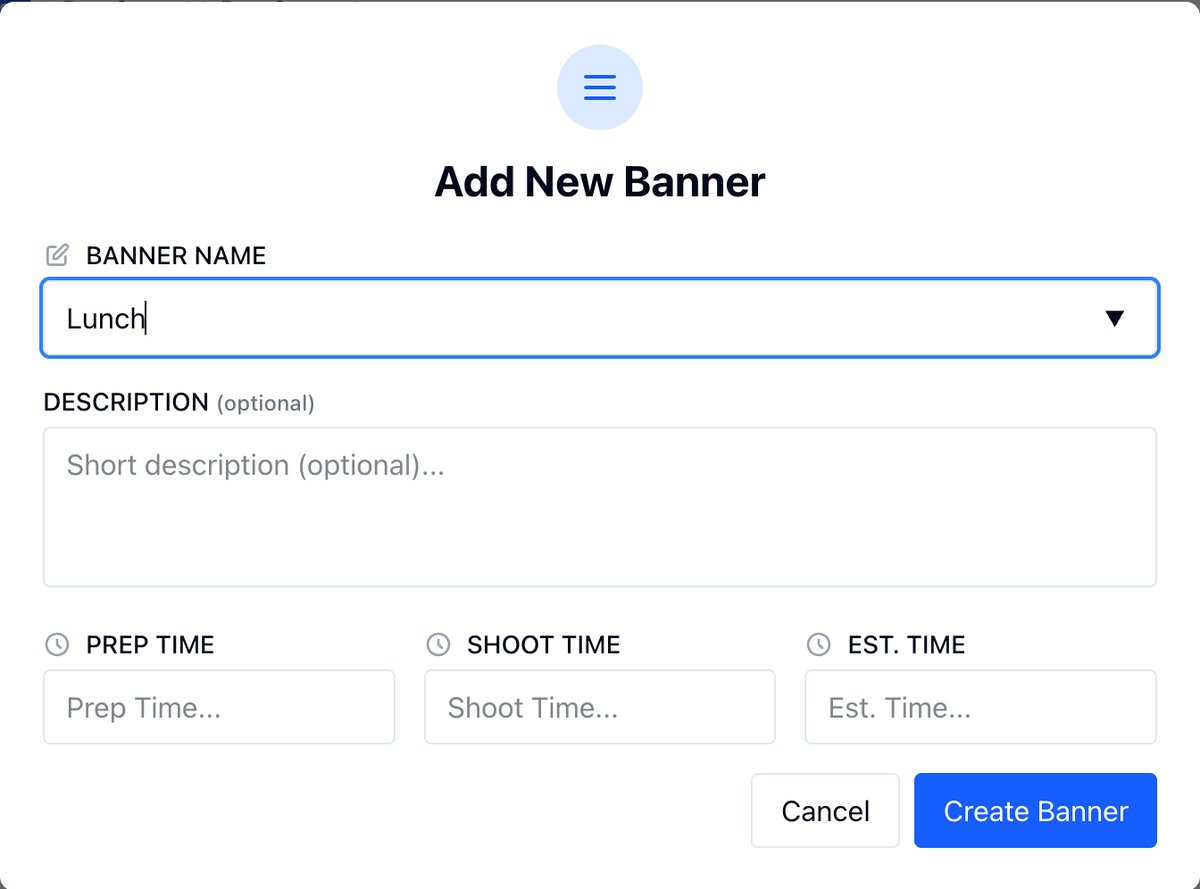
A banner is a label row between strips, like a company move or lunch.- Click the three-dot menu on the strip it goes under, then Add Banner Under.
- Type a Banner name, or pick a suggestion: Company Move, Meal Break, Lunch, or a company move to one of your locations.
- Optional: add a description, and Prep Time, Shoot Time, or Est. Time for how long it runs.
- Click Create Banner.
Split a scene across days
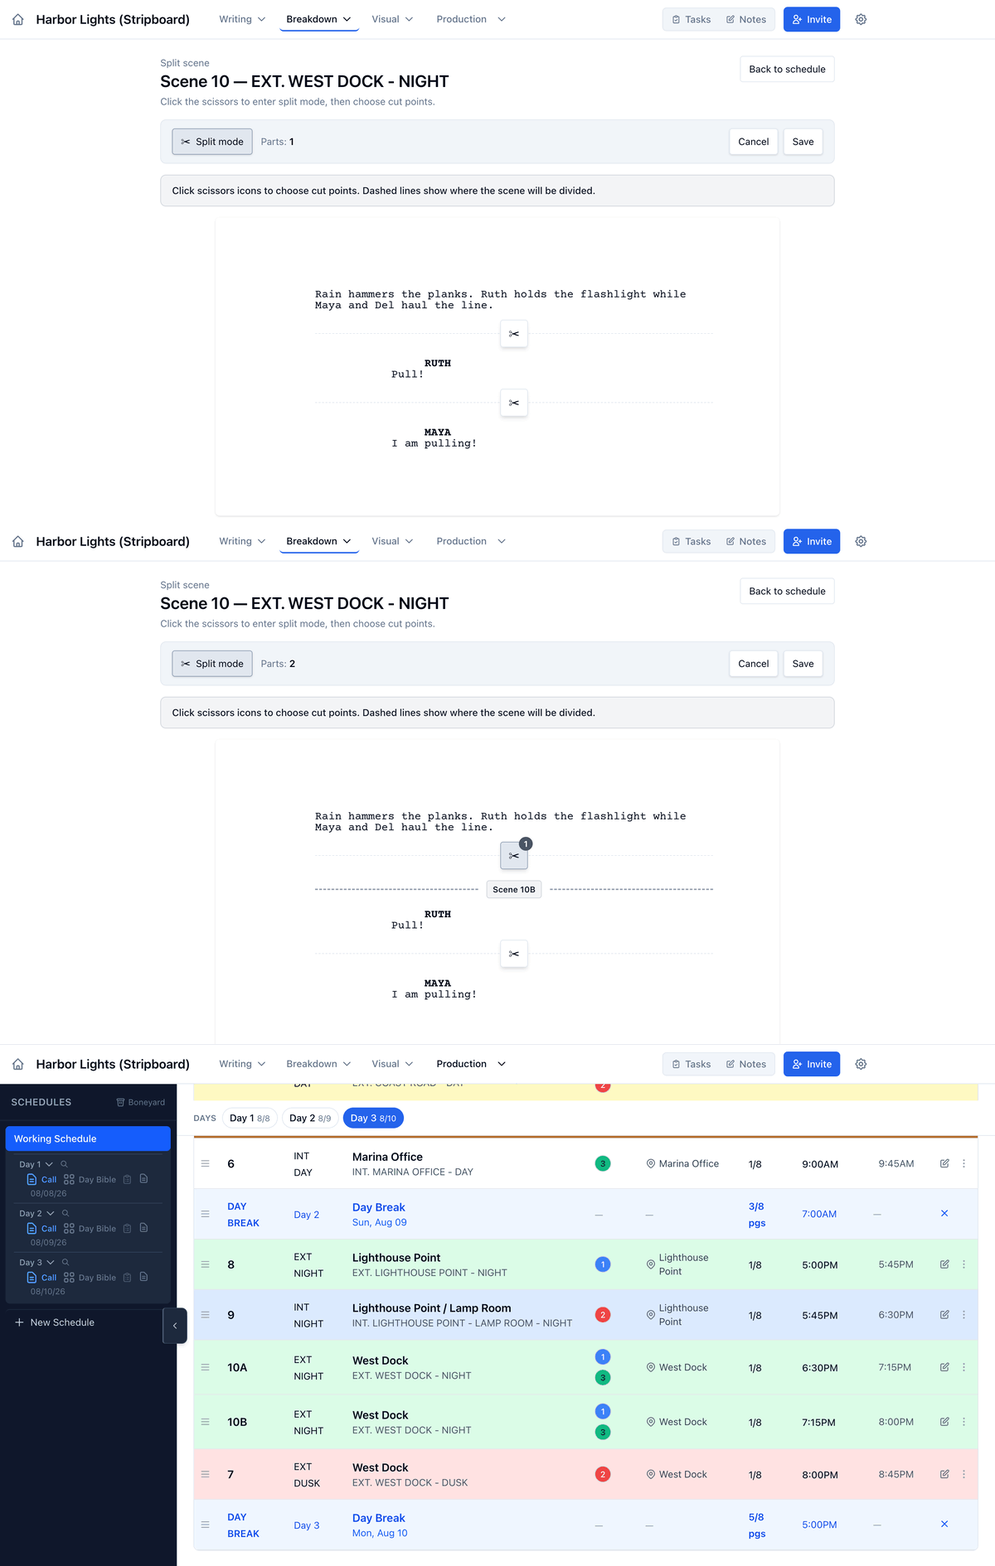
- Click the three-dot menu on the strip, then Split Scene….
- Click Split mode. A scissors shows at every place the scene can be cut.
- Click a scissors, then Cut here. Add as many cuts as you need.
- Click Save.
Set start and end times
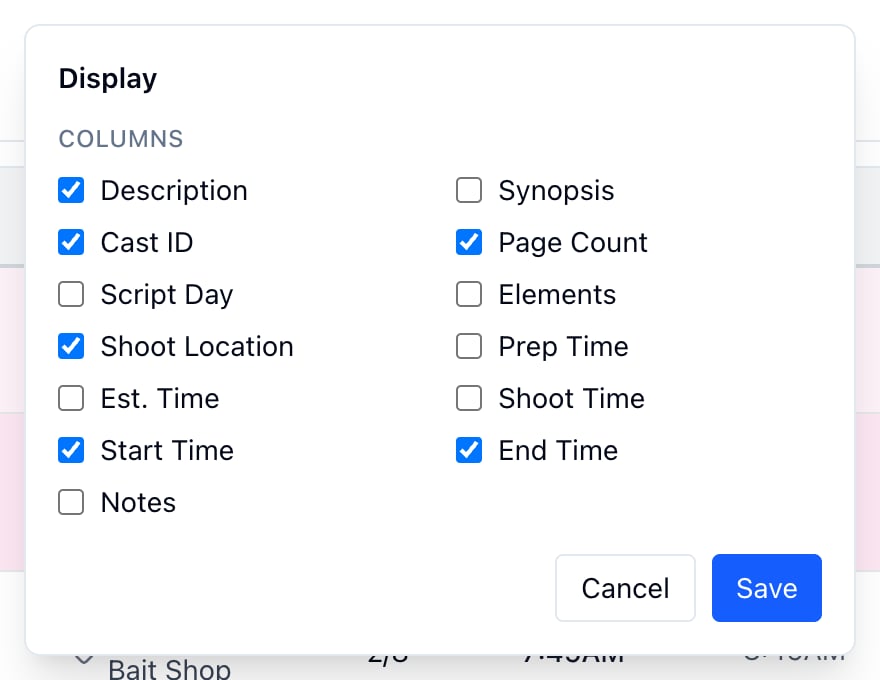
Turn on Start Time and End Time under Display (see below). Then click a strip’s start or end time to change it.
Print a day’s sides
In the sidebar, click the sides icon under a day. Click Day sides (all) for every scene that day, or a character’s name for just their scenes.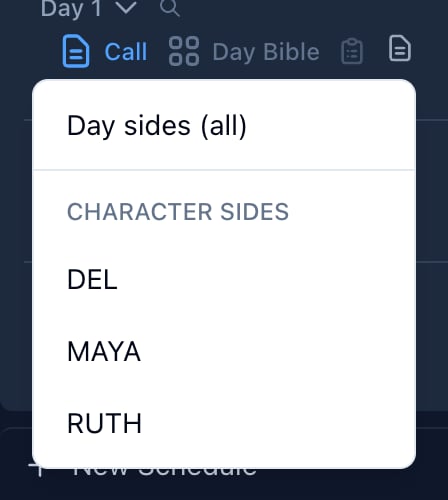
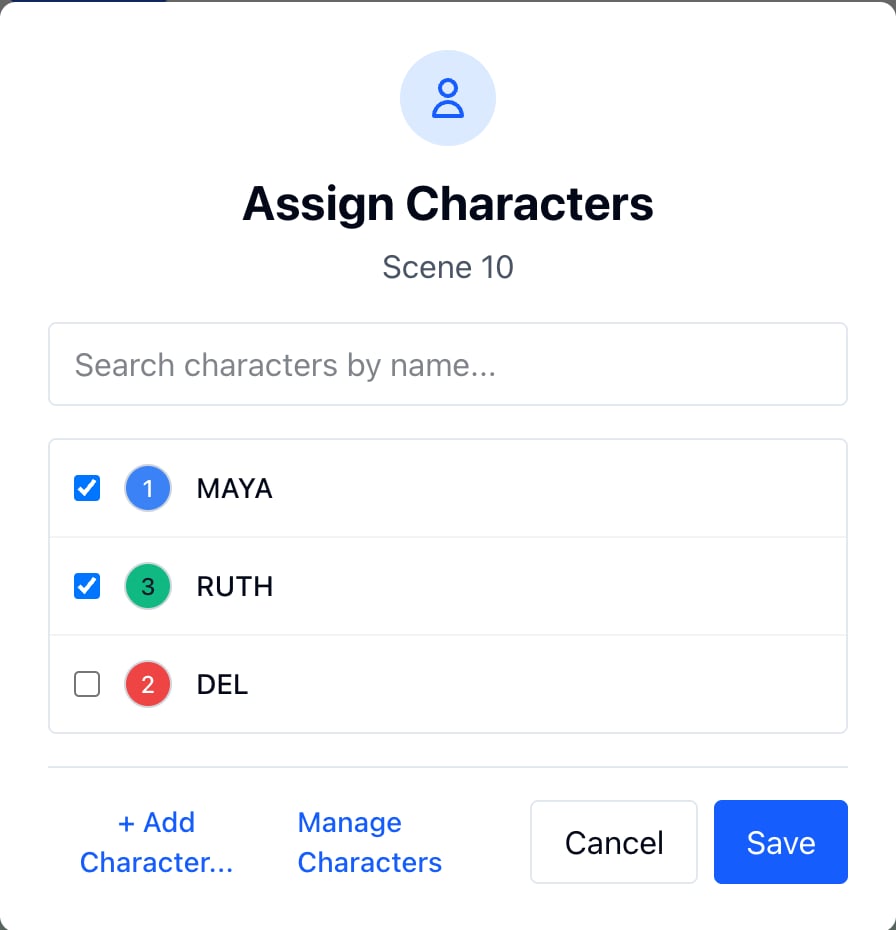
Change who is in a scene
- Click the cast IDs on a strip.
- Check the characters in the scene and uncheck the ones who aren’t.
- Click Save.
Show or hide columns
- In the stripboard toolbar, click Display (the sliders icon).
- Check the columns you want.
- Click Save.
Reorder the whole board
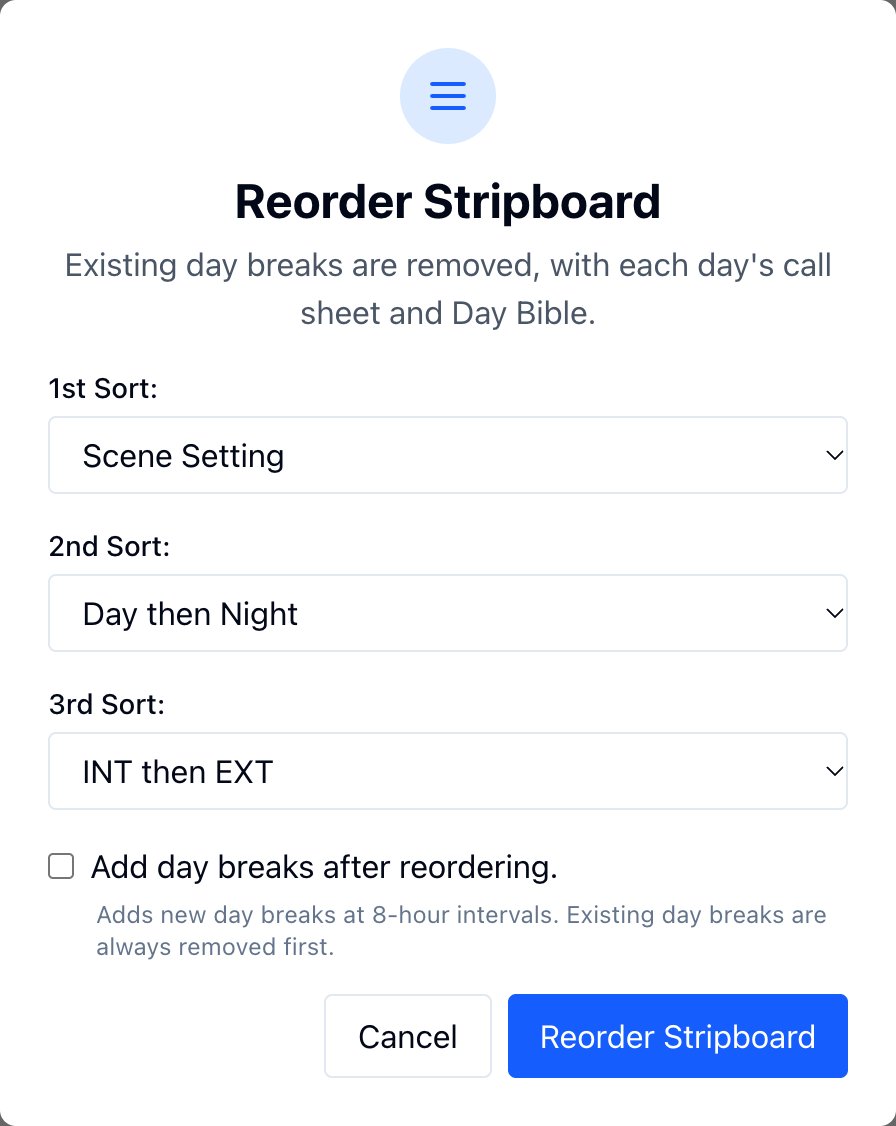
- In the stripboard toolbar, click the three lines icon (Reorder Strips).
- Pick a 1st Sort, 2nd Sort, and 3rd Sort, like Shoot Location, then Day then Night.
- Optional: check Add day breaks after reordering for new day breaks every 8 hours.
- Click Reorder Stripboard.
Reset times
- In the stripboard toolbar, click the clock icon (Reset Times).
- Choose what to clear: everything, clock times only, durations only, the strips’ times only, or the day breaks’ times only.
- Click Reset Times.
—. Dates don’t change.
Remove a scene and bring it back
- Click the three-dot menu on the strip.
- Click Remove from schedule and confirm.
