Managing locations
The Locations page lists every location in your production, both the ones pulled from your script and any you add yourself. From each location’s board you add the address and contact, scout and compare candidate locations, promote the one you pick, lock it, and keep its agreement on file.Where to find locations
In the project nav, open the Production dropdown and click Locations. Each row shows the location name, its rate, a link to its board, a link to the first scene it appears in, how many scenes use it, and a remove button.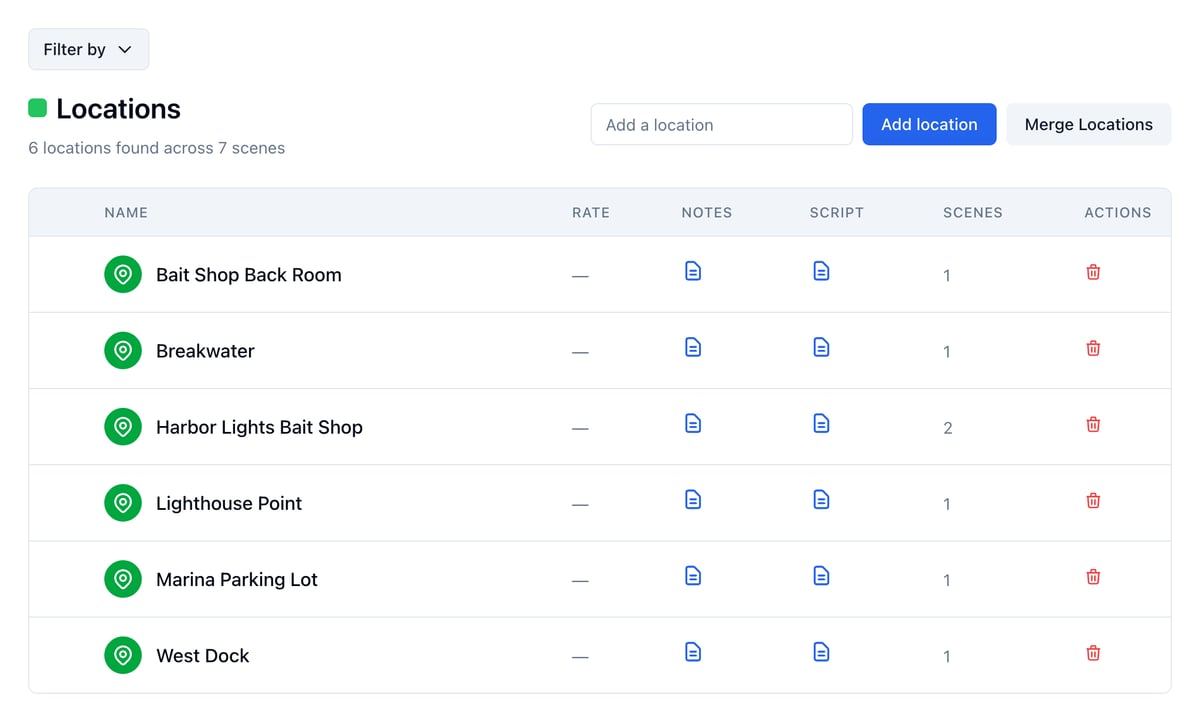
Adding a location before the script is in
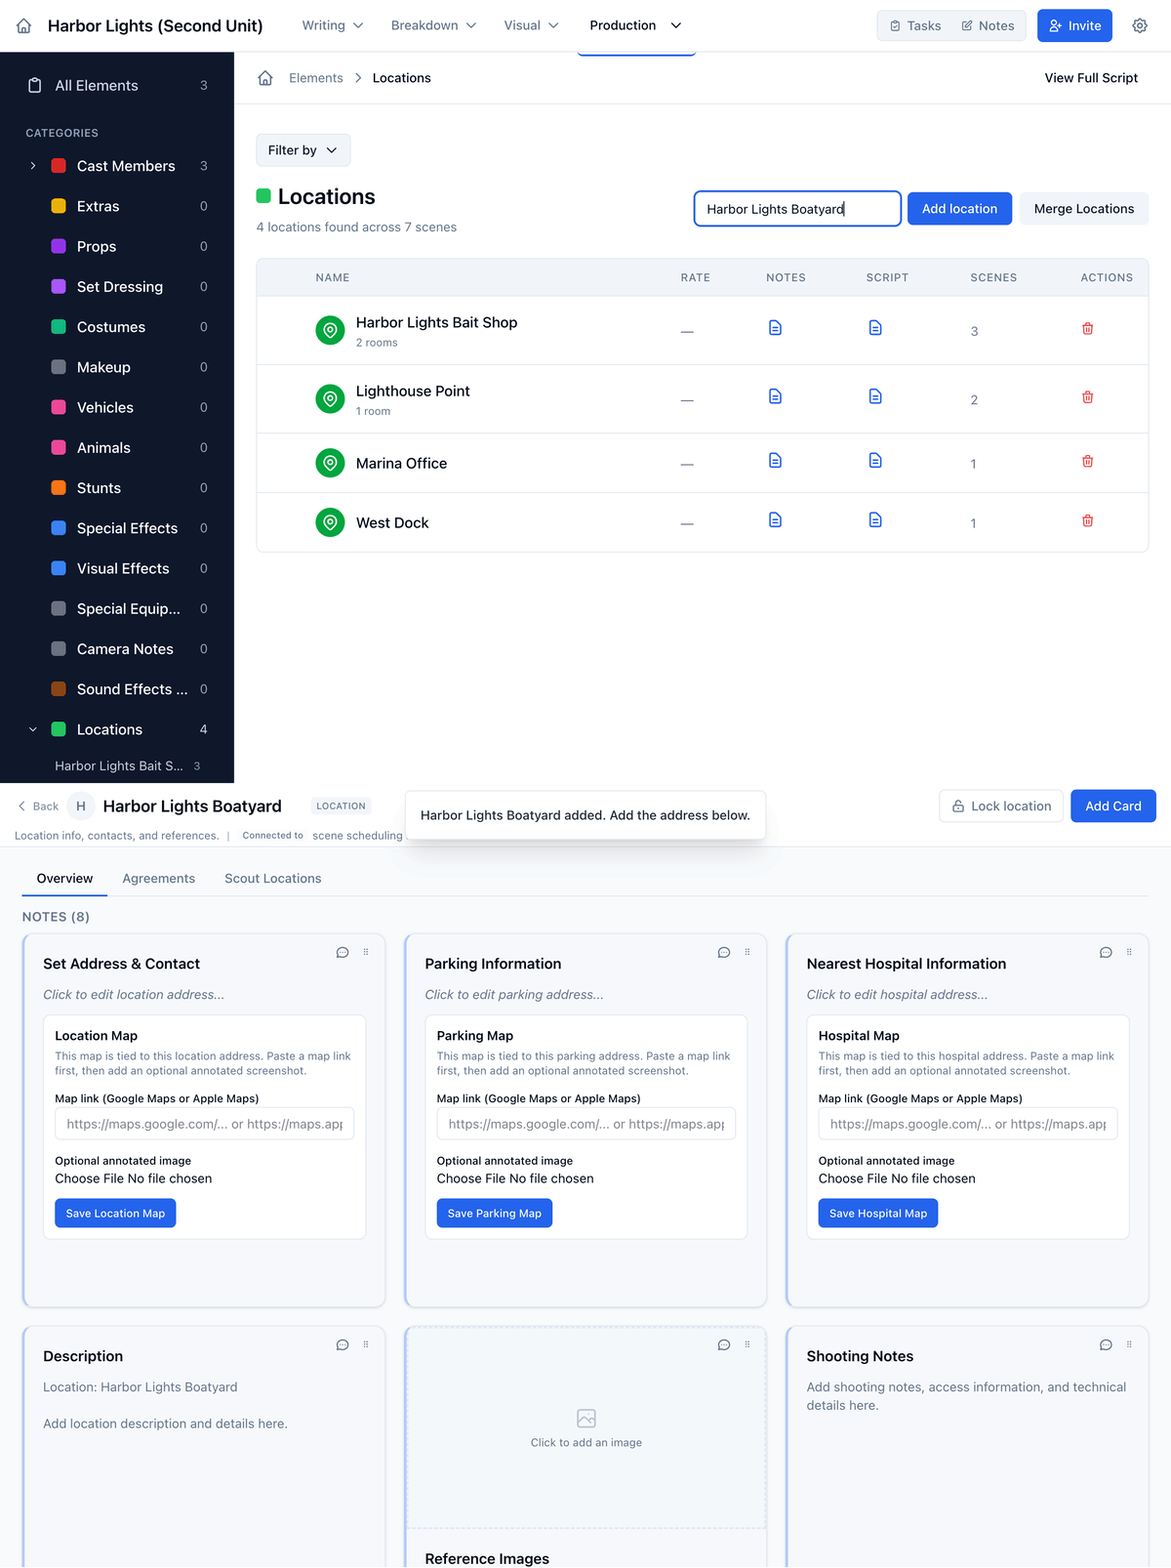
Most locations arrive on their own, pulled from your scene headings when you import a script. On a fast turnaround you often know where you are shooting before the script is locked, so you can add one by hand.- Open the Locations page.
- Type the location name in the Add a location field.
- Click Add location.
Sets inside a location
Spell Slate reads a heading like INT. CHURCH - LOBBY - DAY as one location, Church, with a set, Lobby. The church is the place with the address, the parking map, and the nearest hospital. The lobby is the set the scene plays in. A set can be outside too: EXT. CHURCH - FRONT STEPS - DAY is the church’s Front Steps set.- The breakdown, stripboard, and schedule show the set next to the location, like Church / Lobby.
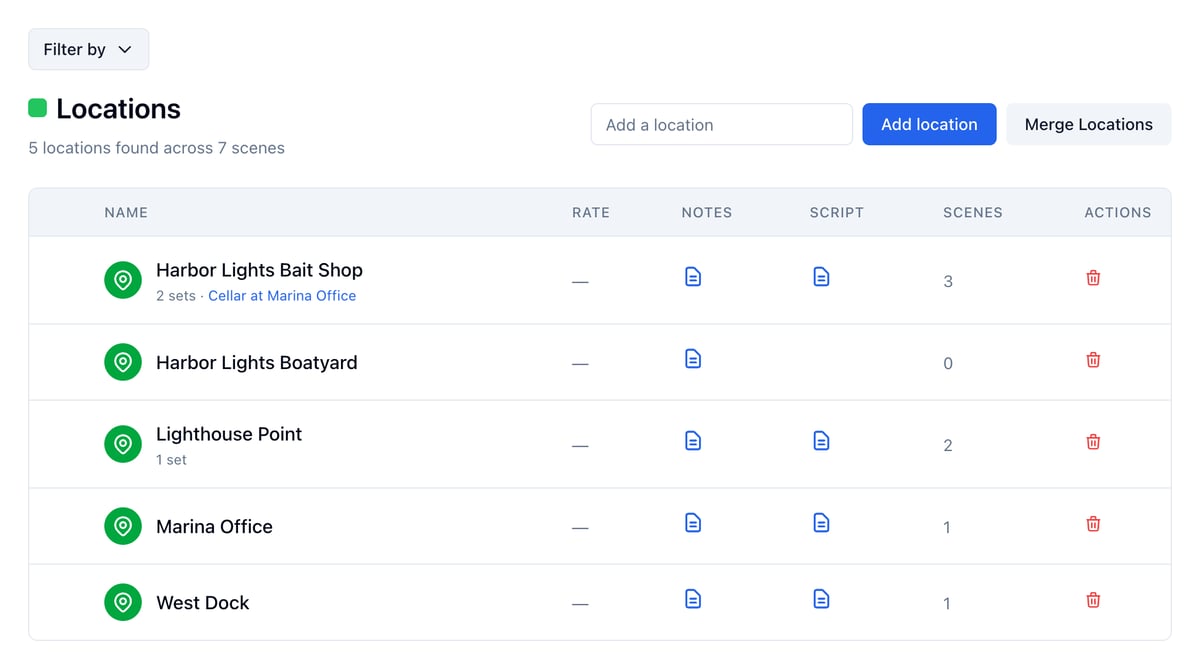
- The Locations list shows how many sets each location has under its name, and names a set only when it is shot somewhere else.
- On the location’s board, the Sets section lists interiors first, then exteriors, each tagged INT or EXT from its scenes. A set the script uses both ways is tagged INT/EXT.
- Your call sheet lists Church once, with its address, and the scene rows still read the heading exactly as written.
- Sets never become separate locations on their own. Church stays one location however many sets the script uses.
- In the script editor, once you type INT. CHURCH - the suggestions list the church’s sets first, then the times of day. Sets come from that location’s board and from the headings already in the draft. A location with no sets yet gets the times of day alone; the first set you write under it is suggested the next time you start that location.
Shooting a set somewhere else
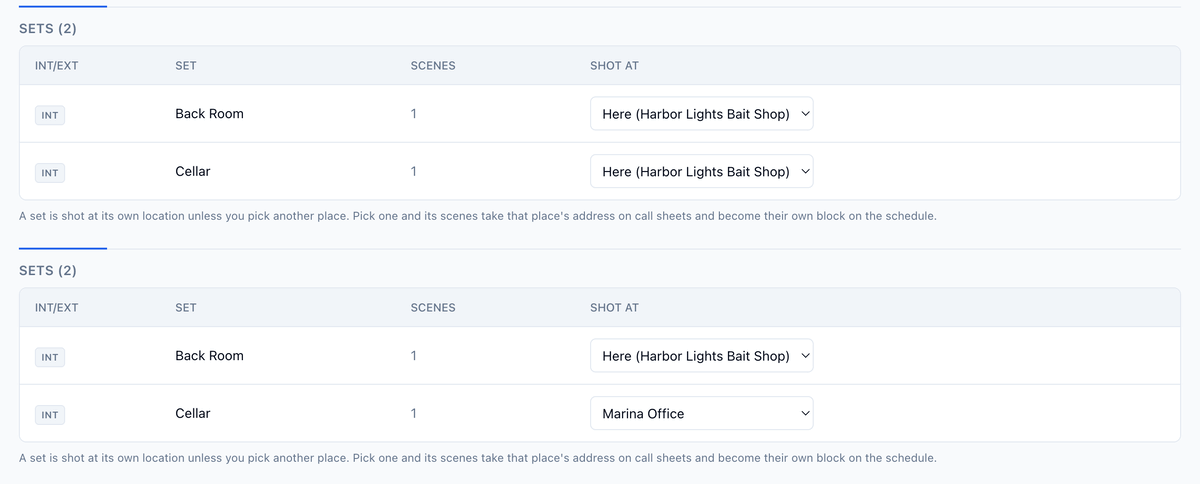
Sometimes the script says church basement and the basement you found is at the community center across town. You do not need to change the script.- Open the church’s board.
- In the Sets section, find Basement.
- Under Shot at, pick Community Center.
Location boards
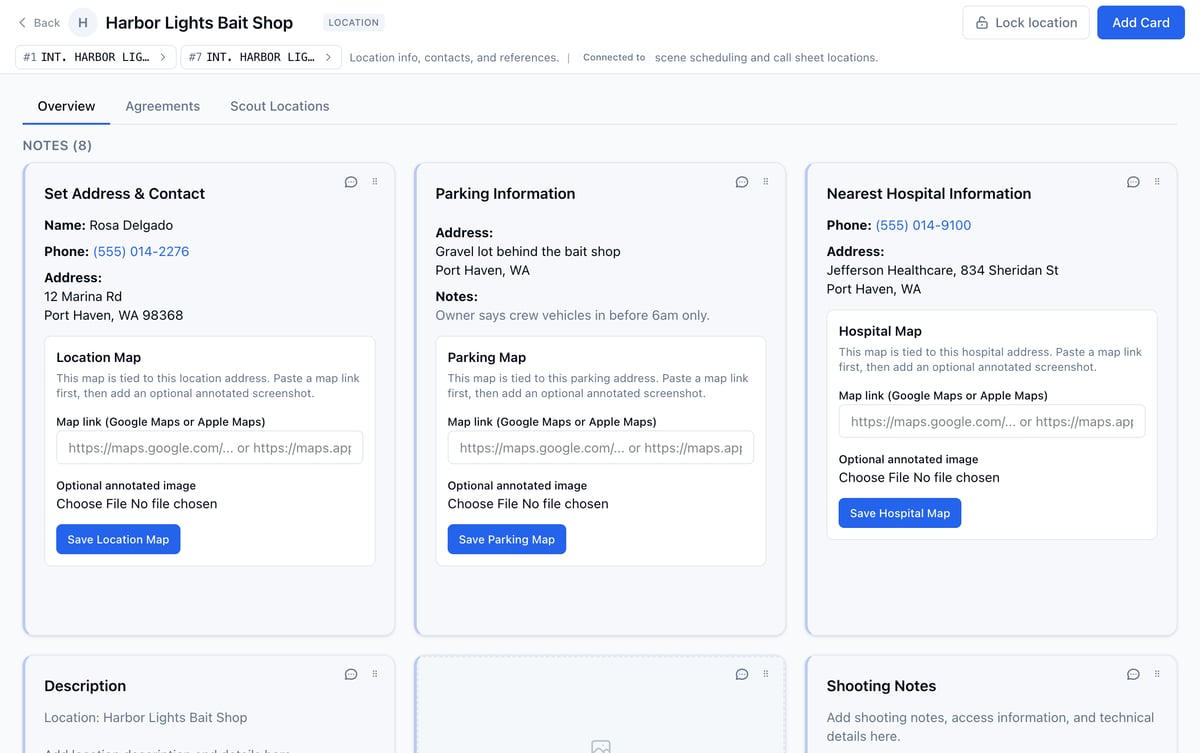
Each location has a board where you store production details for that location. When you open a location board for the first time, Spell Slate pre-fills it with seven template cards to get you started:- Set Address & Contact — The confirmed address and contact for this location. This card syncs to the call sheet: when this location is scheduled, its address appears in the Locations section of the call sheet automatically.
- Parking Information — Parking address or instructions. This syncs to the Parking column on the call sheet.
- Nearest Hospital Information — Hospital address and phone. This syncs to the Nearest Hospital column on the call sheet.
- Description — A general description of the location.
- Reference Images — Photos or scouting images.
- Shooting Notes — Notes for the crew on the day.
- Cost / Budget — Estimated, actual, and paid amounts, with a rate, unit, and quantity. See Tracking location costs.
Parking maps (link first)
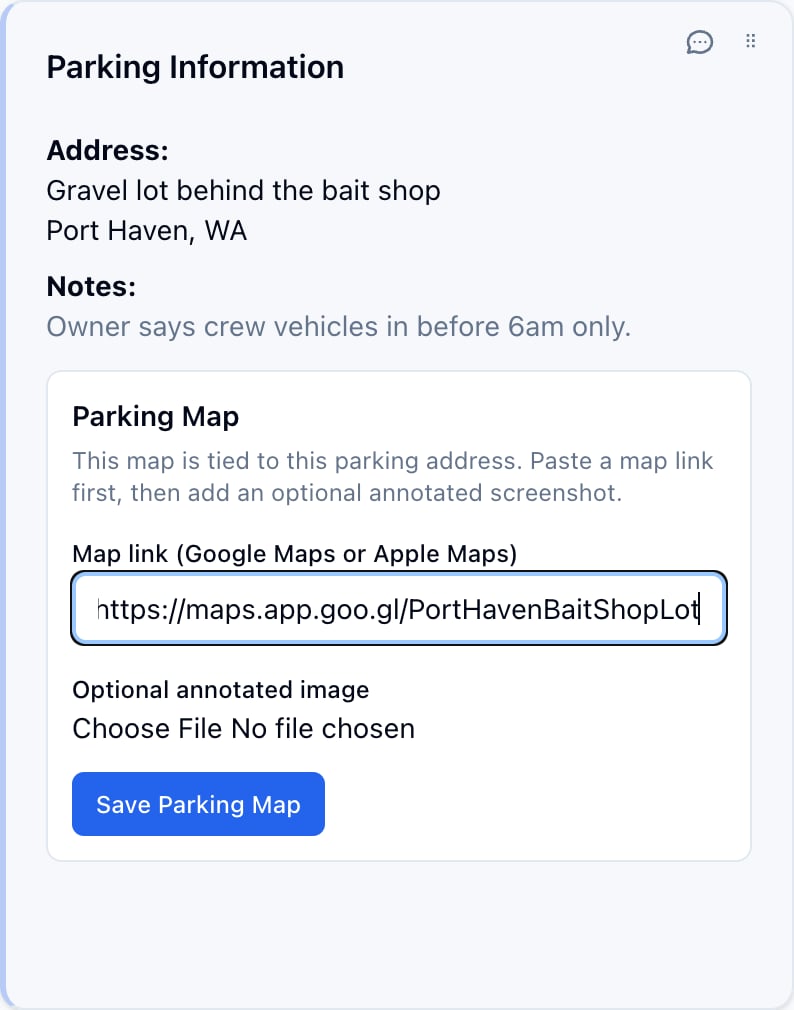
Parking maps are saved on the location’s board and reused by the call sheet.- On the location’s board, find Parking Map inside the Parking Information card.
- Paste a Google Maps or Apple Maps link under Map link.
- Optional: choose an annotated screenshot (arrows, circles, notes) under Optional annotated image.
- Click Save Parking Map.
- The call sheet shows a View Parking Map button when a link exists.
- The public call sheet view shows the same View Parking Map button.
- The PDF shows the parking map URL as plain text.
- If an image is uploaded, it renders inline on the call sheet and PDF.
Scout locations
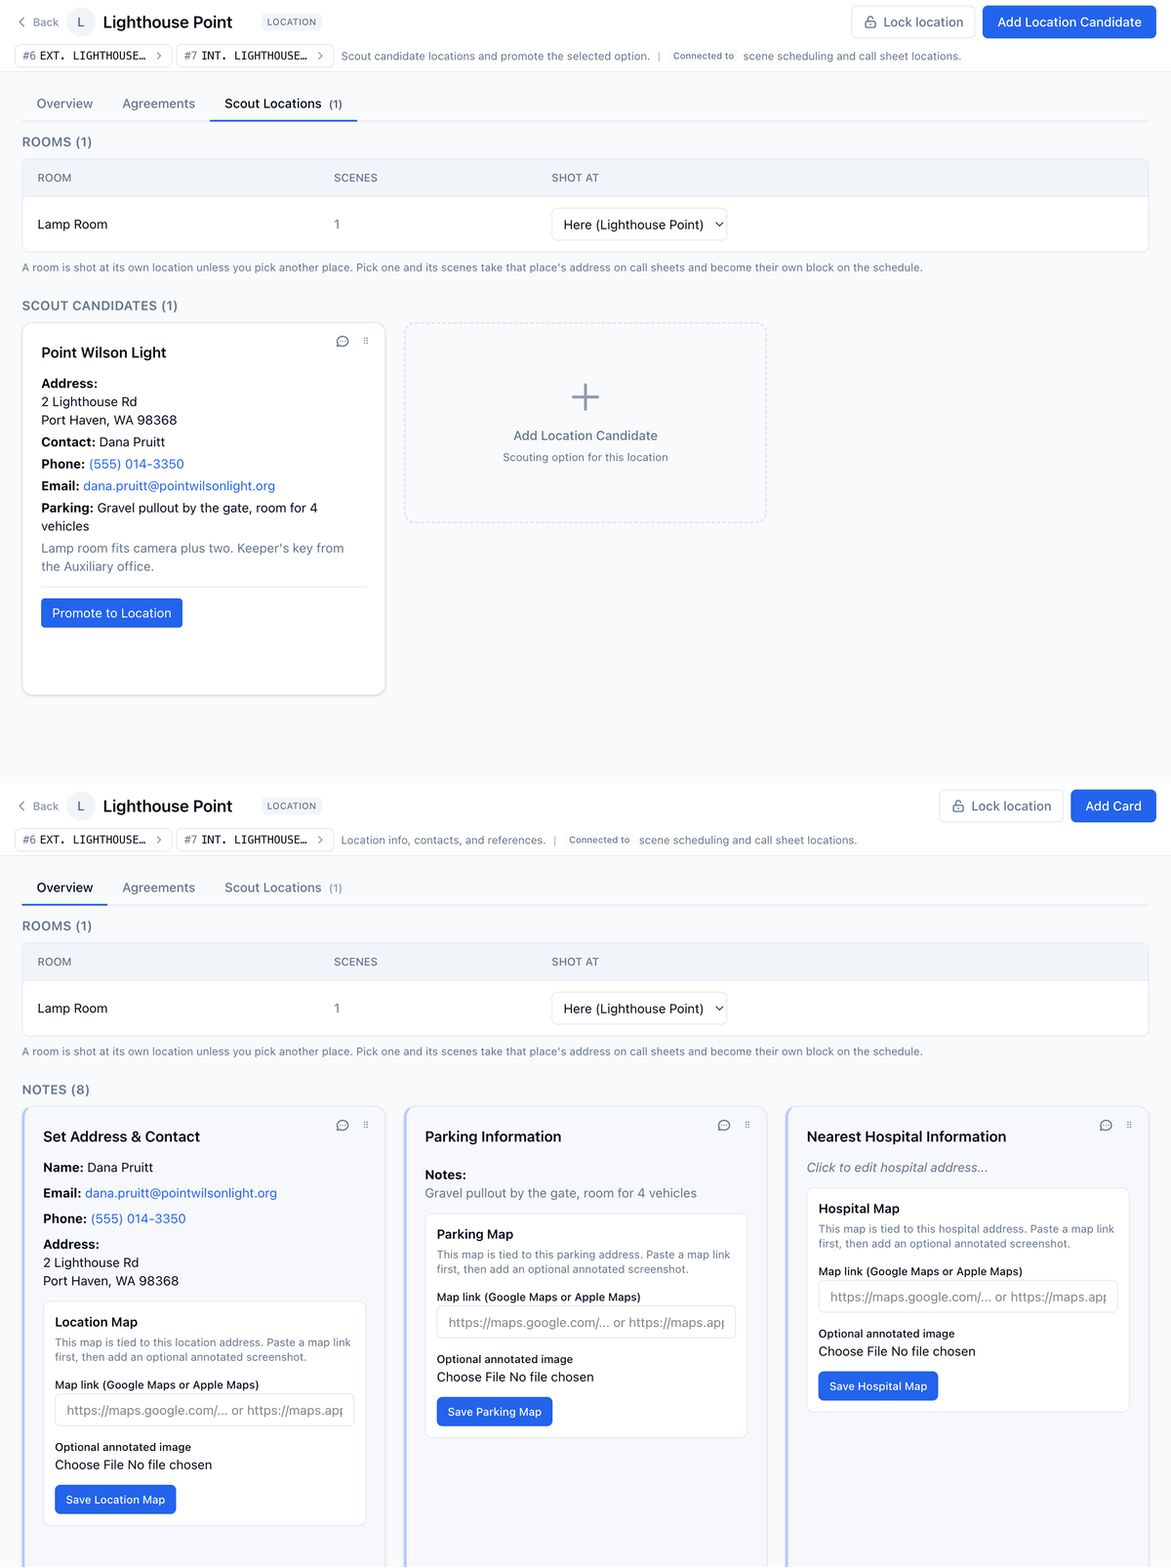
Before you lock a location, you may be considering several options for the same script location. The Scout Locations tab on a location board is where you track those candidates. Why use scout locations: Keeping candidate locations on the board means you can compare options side by side, share scouting notes with the team, and then promote the winner to the confirmed location in one step. The script location record stays clean, while the candidates hold all your research. To open the Scout Locations tab: Open the location’s board and click the Scout Locations tab in the header. You will see all candidates for that location and a count badge.Adding a scout location candidate
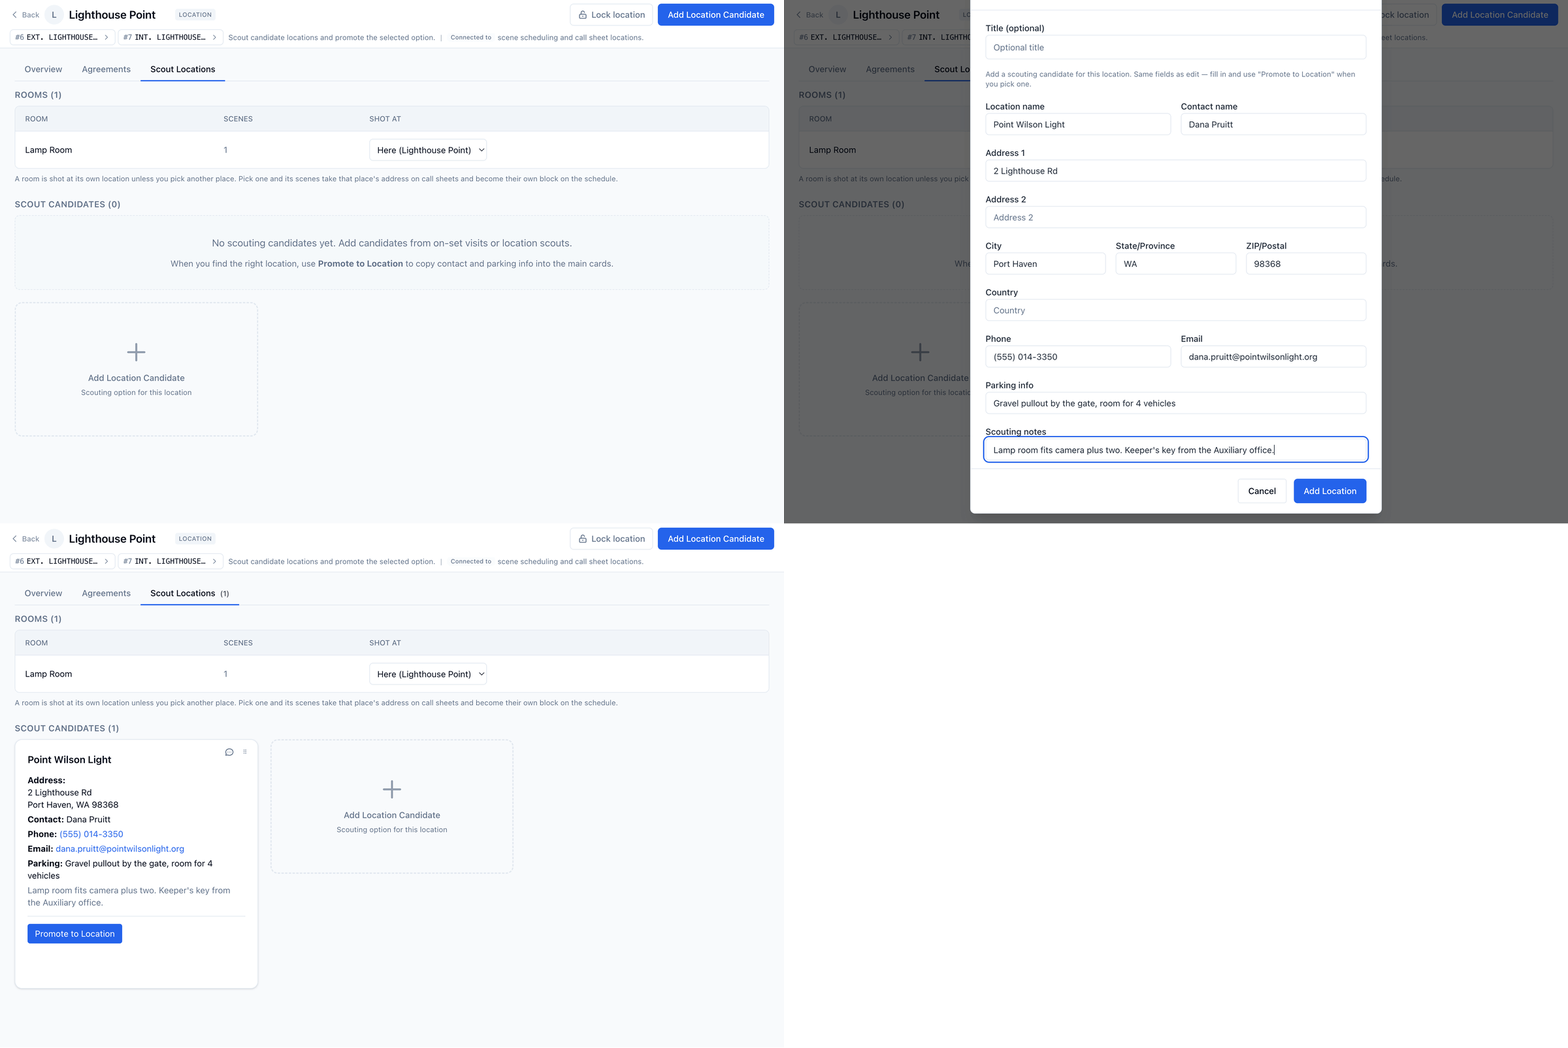
- Open the location board and go to the Scout Locations tab.
- Click Add Location Candidate.
- Fill in the candidate details:
- Location name — The card’s title, so you can tell candidates apart (e.g. “Warehouse on 5th” or “Studio B”).
- Contact name, Phone, Email — The property owner or location manager.
- Address — Full address including city, state/province, ZIP, and country.
- Parking info — Parking options at this candidate.
- Scouting notes — Anything relevant: access, permit requirements, power, noise, restrictions.
- Click Add Location.
Promoting a scout location to the confirmed location
When you have chosen a candidate, use Promote to Location to move that candidate’s details into the confirmed location record.- Open the Scout Locations tab and find the candidate you want.
- Click Promote to Location on the candidate card, then click OK to confirm.
- The candidate’s contact name, email, phone, and address go into the Set Address & Contact card.
- The candidate’s parking info goes into the Parking Information card’s notes.
- The candidate’s scouting notes replace the Description card’s text.
Locking a location
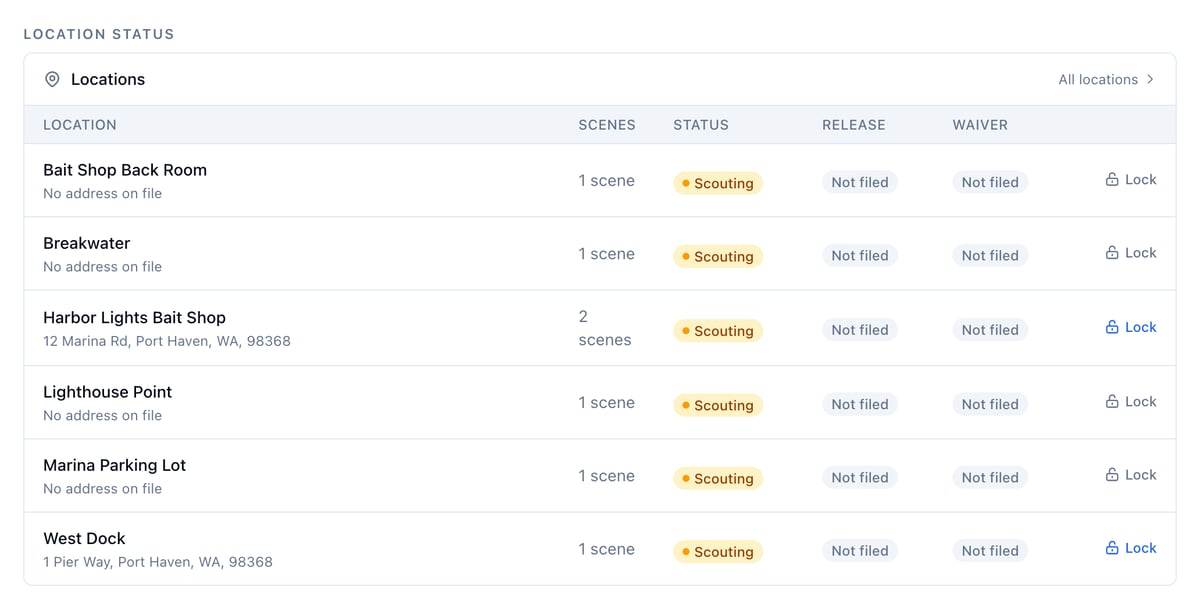
Locking a location is how a producer marks it confirmed. This is the location. Scouting is over. A locked location shows a Locked badge in the Production Bible and in the location board header. Unlocked locations show Scouting.Before you can lock
You must have an address in the Set Address & Contact card on the location board. The Lock button is always visible. If you click it before the card has address content, Spell Slate tells you to add an address first and the location stays in Scouting. Fill in at least the address fields on that card, then lock.Lock from the location board
- Open the location board.
- Click Lock location in the header next to Add Card.
- The button changes to Locked.

Lock from the Production Bible
- Click Production in the nav to open the Production Bible.
- Find the location in the Location Status table.
- Click Lock in the row. If no address is on file, Spell Slate tells you to add an address first. The row also shows “No address on file” under the location name.
Location agreements
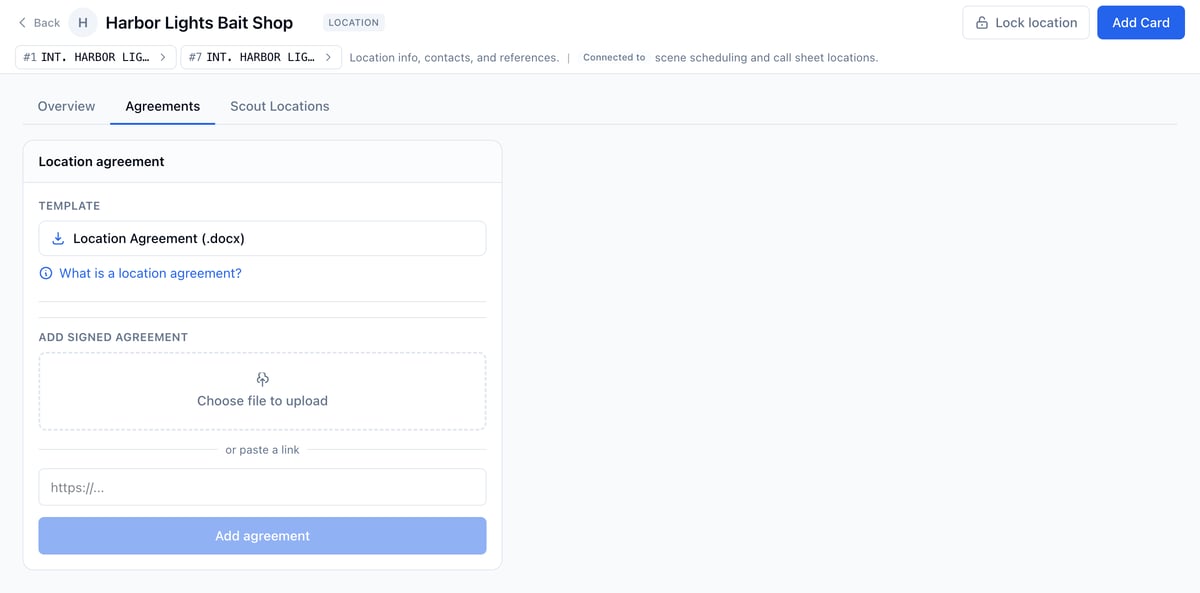
Open the location’s board and click the Agreements tab.- Location Agreement (.docx) — Spell Slate’s editable agreement template you can download, fill in, and sign.
Tracking location costs
The Cost / Budget card on the location’s board holds the estimated, actual, and paid amounts, with a rate, unit, and quantity. When you pull locations into the budget, the card and its budget line stay in sync. See Budget and Line items and board sync.Renaming a location
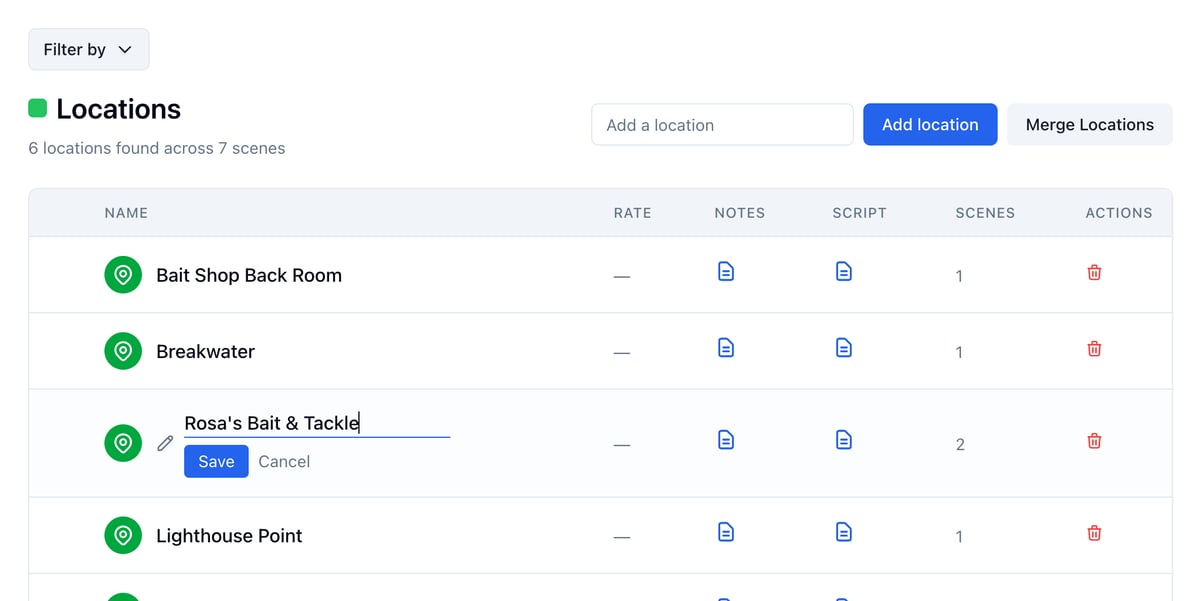
Locations take their name from the scene heading, so a re-import can leave you with “COFFEE SHOP” when the crew calls it “Cornerstone Cafe”. Rename it from the Locations list or from the location’s board. From the Locations list:- Open Production → Locations.
- Hover the location name and click the pencil icon next to it.
- Type the new name and press Enter, or click Save.
Removing a location
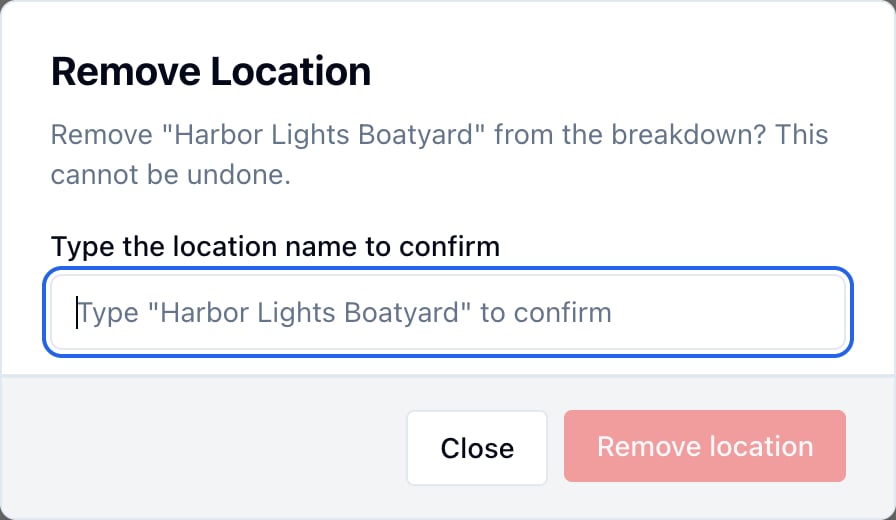
A location can only be removed from the breakdown if it is not referenced in the current version of your script. Spell Slate shows how many scenes use each location in the Scenes column. If the location still appears in your script, you have two options:- Edit the script. Change or remove the scene heading that references the location. In the Spell Slate editor, update the location text in the heading (for example, change “INT. COFFEE SHOP - DAY” to a different location). Once the location no longer appears in any scene heading, it is eligible for removal.
- Upload a new version. If you are working from an imported script, upload a revised version that does not include that location. Spell Slate will automatically remove locations that no longer appear in the new version and have no production data attached.