Managing vehicles

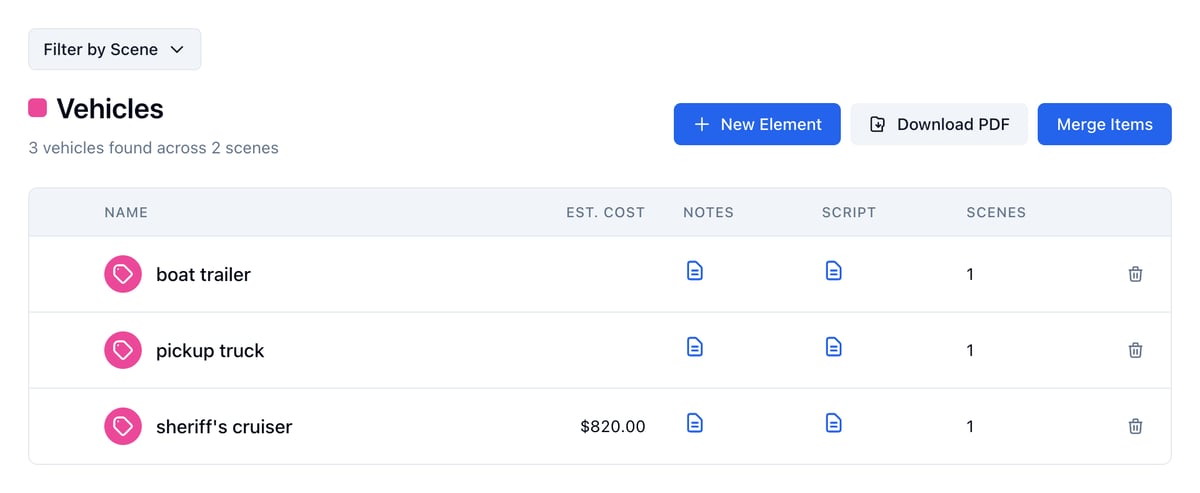
Picture cars are some of the biggest checks on a small shoot: the truck the lead drives, the cruiser in the background, the van that has to be at the dock by nine. Tag each one in the script and it gets a board for what it is, where it’s rented from, and what it costs. In the project nav, click Breakdown, then Elements. Under Vehicles, click Open hub. The Vehicles list for Harbor Lights (Picture Cars): boat trailer, pickup truck, and sheriff's cruiser at $820.00 Each row links to the vehicle’s board and to its scene in the script, and shows how many scenes it appears in. Est. Cost shows what the vehicle is expected to cost once someone costs it. Only people who can see the budget see that column.
Tag a vehicle from the script

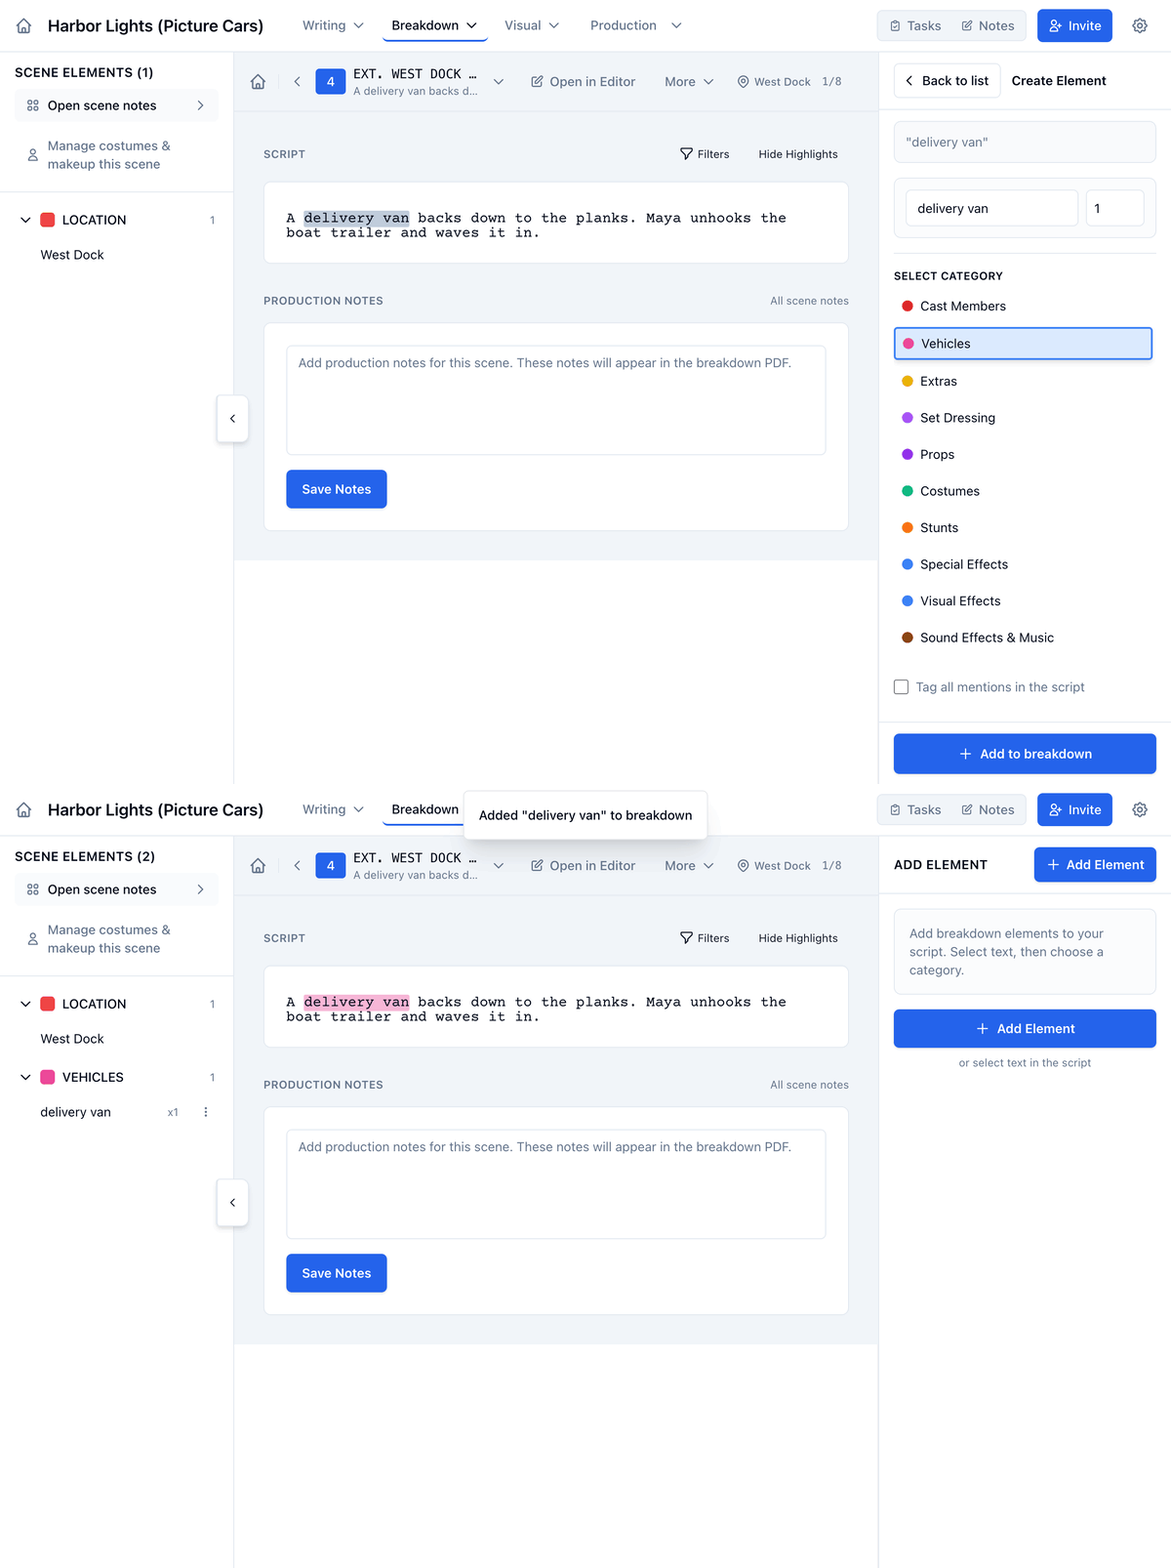
  1. Open Breakdown and click the arrow in a scene’s Breakdown column.
  2. In the script, select the words for the vehicle, like delivery van.
  3. In the panel on the right, under Select Category, click Vehicles.
  4. Click Add to breakdown.
Selecting delivery van in the dock scene and choosing Vehicles, then delivery van listed under Vehicles in the scene's elements You can also click Add Element without selecting any text and type the name yourself. See Tagging elements in a script breakdown for more on tagging.

Record how many you need and where it comes from

Open a vehicle’s board from the Vehicles list. The Info tab holds its details:
  • Quantity: how many the scene needs, like two matching cruisers.
  • On screen: turn it off for a vehicle that’s only heard or mentioned.
  • Source: Rental, Purchase, Owned, Made, Borrowed, or TBD.
  • Scene: the scene it’s tagged in, with a link to it.
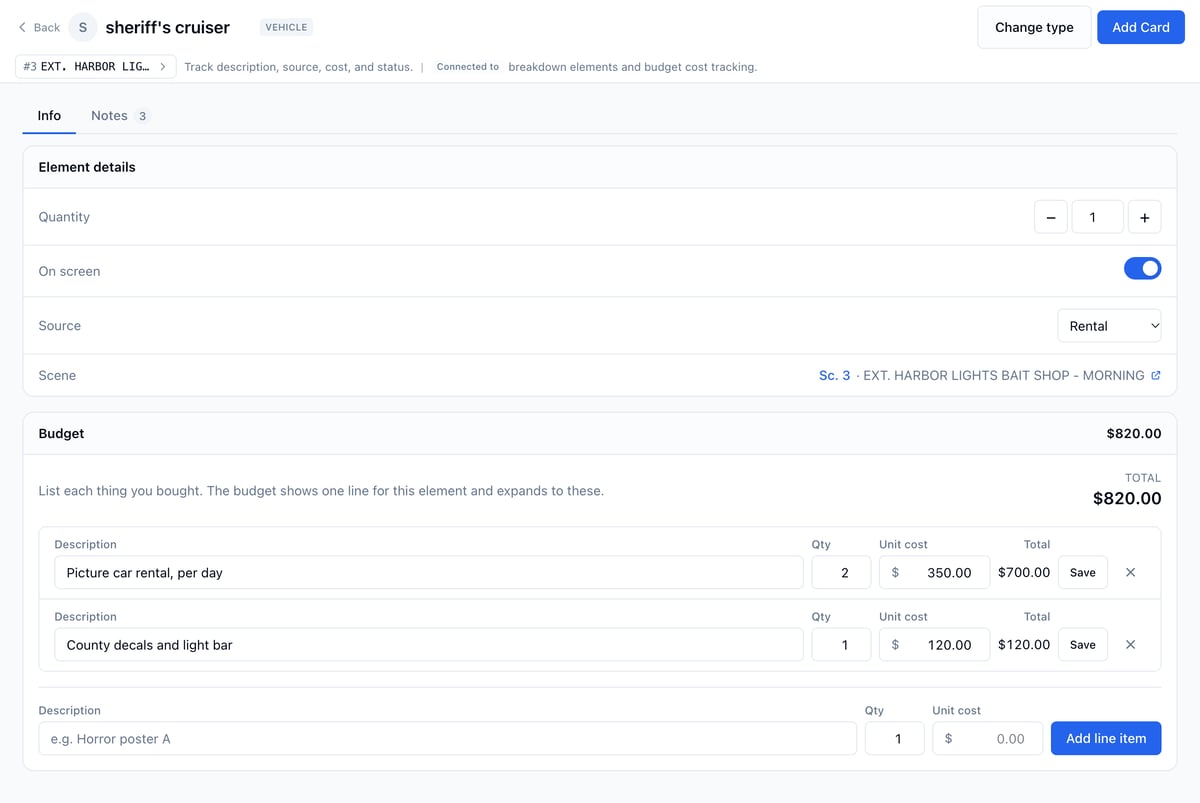
The sheriff's cruiser's Info tab: quantity 1, on screen, sourced as a rental, with two budget line items totaling $820.00

Track what a vehicle costs

List what you’re paying for under Budget on the Info tab:
  1. Type a Description, like “Picture car rental, per day”.
  2. Set the Qty.
  3. Type the Unit cost.
  4. Click Add line item.
The total fills Estimated on the vehicle’s Cost / Budget card and the Est. Cost column in the Vehicles list, and the vehicle shows as one line in your Budget, under Transportation. If your budget doesn’t have a Transportation category yet, it’s added when the vehicle’s line is. If you’d rather track the vehicle as a single amount, leave the line items empty. Open the Notes tab and type the amount in Estimated on the Cost / Budget card. For more on line items, see Line items and board sync.

Add a Specifications card

  1. On the vehicle’s board, click Add Card.
  2. Click Specifications, then Continue.
  3. Type a Title, like “Maya’s truck”.
  4. Click + Add field… and pick a field, like Make.
  5. Type its value.
  6. Repeat for each field you want, then click Create Card.
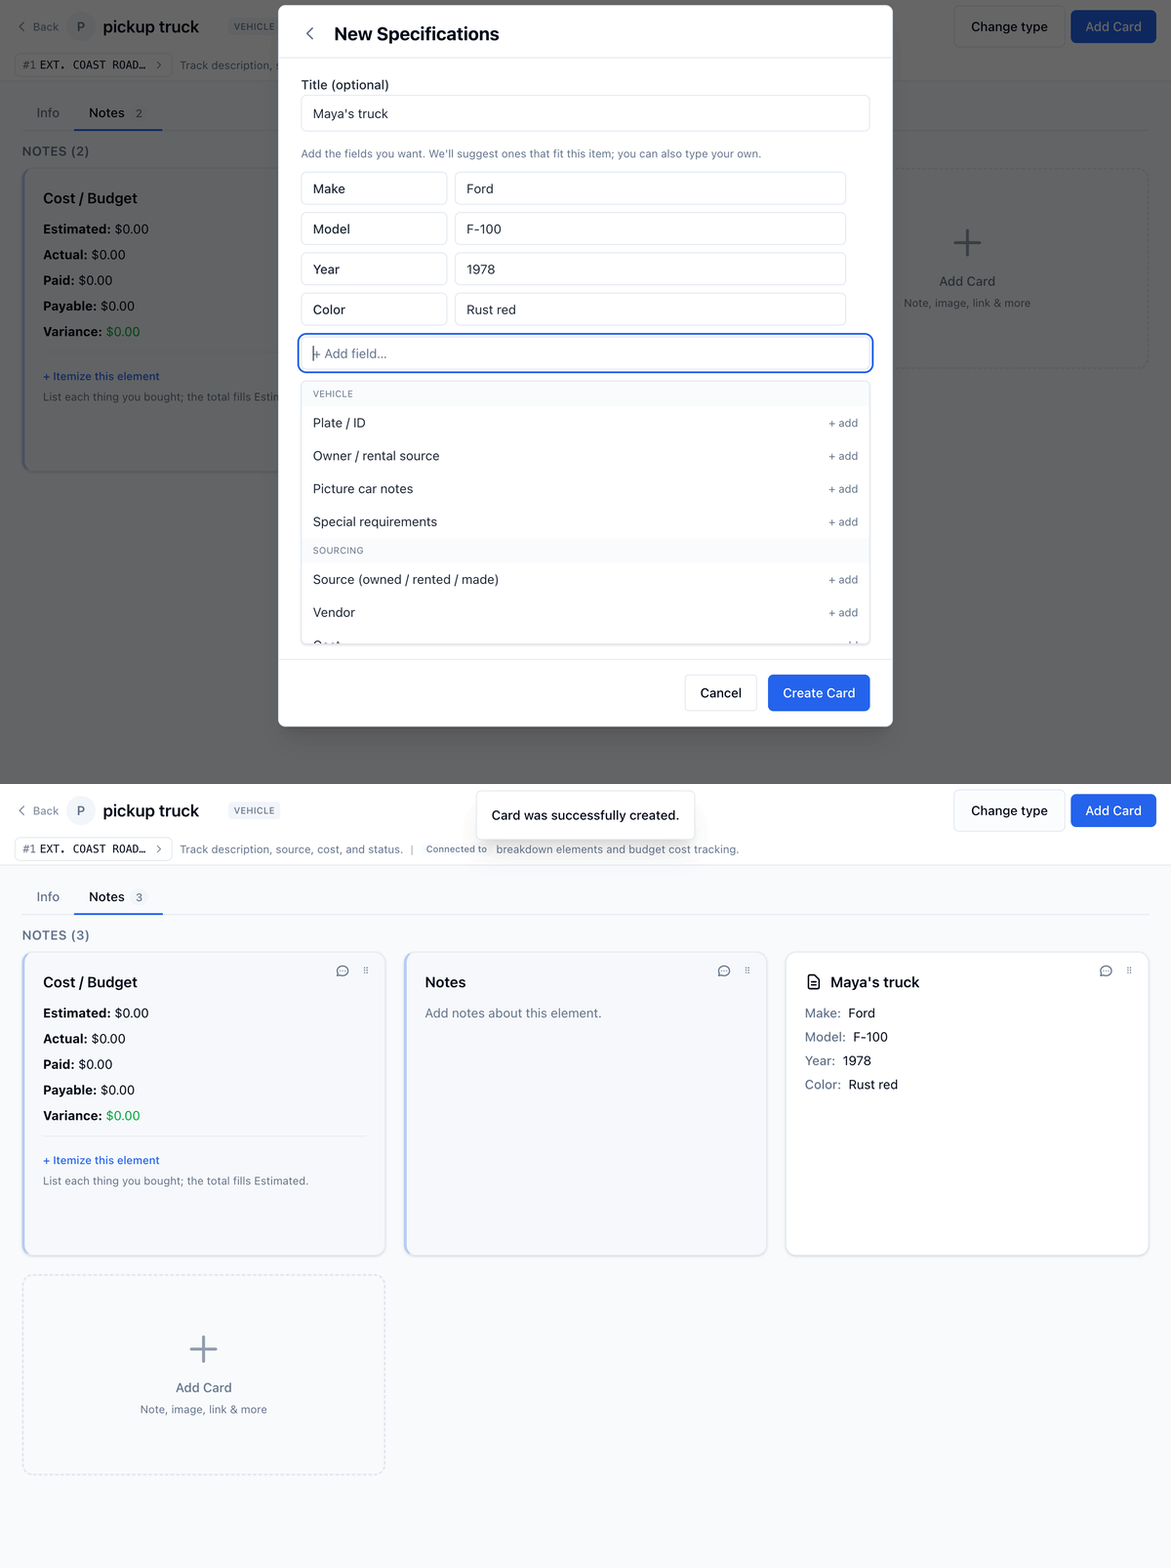
Adding Make, Model, Year, and Color to a Specifications card for the pickup truck, then the card on the board For a vehicle, + Add field… suggests Make, Model, Year, Color, Plate / ID, Owner / rental source, Picture car notes, and Special requirements (camera mounts, a period look, towing), plus sourcing fields like Vendor and Pickup date. You can also type a field name of your own. A vehicle’s board also takes Note, Link, Image, Todo, Contact, and Moodboard cards, for reference photos, the rental listing, a checklist for getting it to set, or the picture car company’s contact.

Rename, merge, or move a vehicle

Renaming a vehicle, merging two vehicles tagged under different names, and moving one to another category with Change type work the same way as for props. See Managing props.