

Builder and coverage
Who can do this: Free plan on your first project, Supporter on all projects. Adding and editing shots needs project edit access; members with view access get the read-only list view instead.The Builder is where the shot list gets made, whether that’s weeks out in prep or the night before you shoot: script on the left, shots on the right, and an entry row built to keep up with you and your DP calling out shots. Find it under Visual → Builder.
Open a scene
- The first scene opens on its own. Click a scene in the left sidebar to switch. Scene parts appear as badges under their scene.
- The scene’s script loads in the center and its shots load in the right panel.
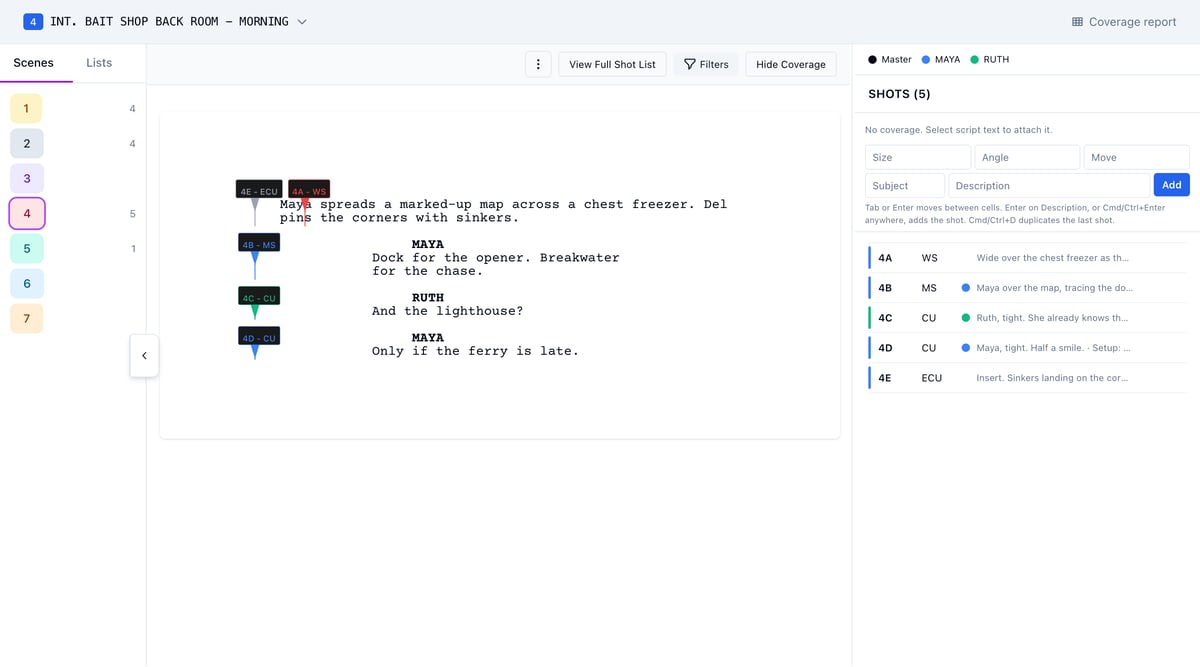
Size the shots panel
Drag the thin divider between the script and the shots panel. The script keeps its page width and scrolls sideways if the panel takes more than the window can give; the panel never drops below a third of a screen. Your width is remembered on this computer for every project. Double-click the divider to go back to the default. From about 560px wide the panel works like a sheet: the entry row becomes one line, and each shot row shows its Angle, Move, and subject next to the description.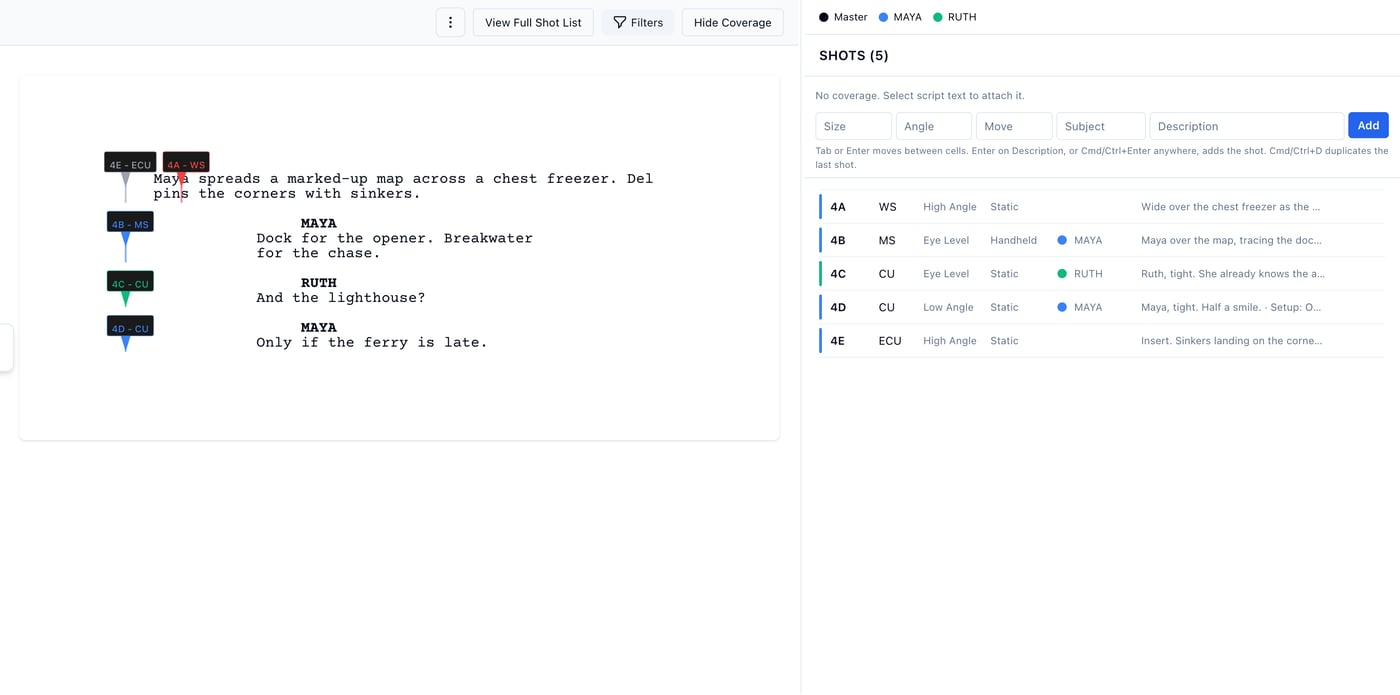
Add a shot with the entry row
The entry row sits at the top of the shot list, under the Shots heading, and is always ready for the next shot. A new shot lands in the list below it.- Click into the Size cell. Its options open at once. Type to narrow them, and spreadsheet shorthand works:
ws,cu,ots, andmasterall resolve (master becomes WS). On manual shot numbering, an Identifier cell comes first; type the shot’s number or letter there. - Press Enter or Tab to confirm the suggestion and move to the next cell.
- Fill Angle, Move, and Subject the same way, or skip past any of them.
- Type a Description, then press Enter to add the shot.
Attach script coverage to a new shot
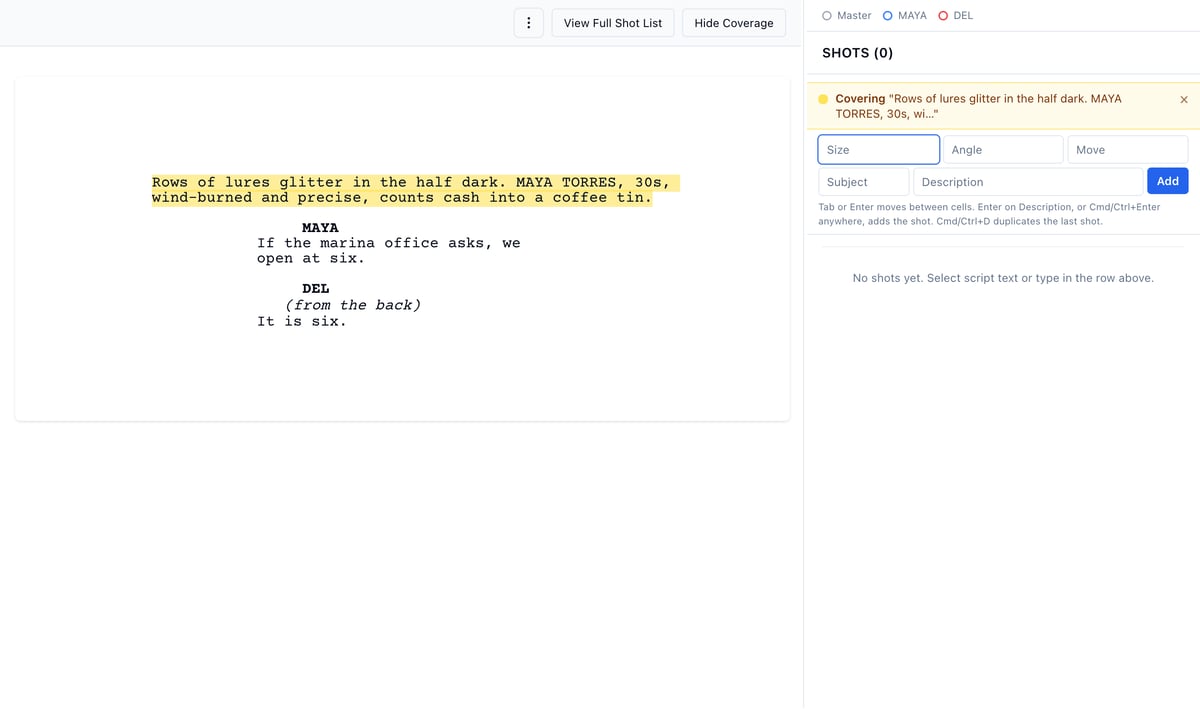
- Select the script text the shot covers. The text stays marked in yellow, and a Covering note with your words appears above the entry row’s cells.
- Fill the cells, starting in Size, which is already focused. Type a size, or press the down arrow to see the choices.
- Press Enter on the description to add the shot.
Duplicate the last shot
Press Cmd+D (Mac) or Ctrl+D (Windows) with the entry row focused. The scene’s last shot is copied in full, coverage included, as the next letter variant (a3A becomes 3B). Focus stays in the row, so repeating the shortcut builds out variants quickly.
To duplicate any other shot, open it and use Duplicate in the inspector’s ⋯ menu.
Edit a shot
- Click a shot in the right panel to open the inspector.
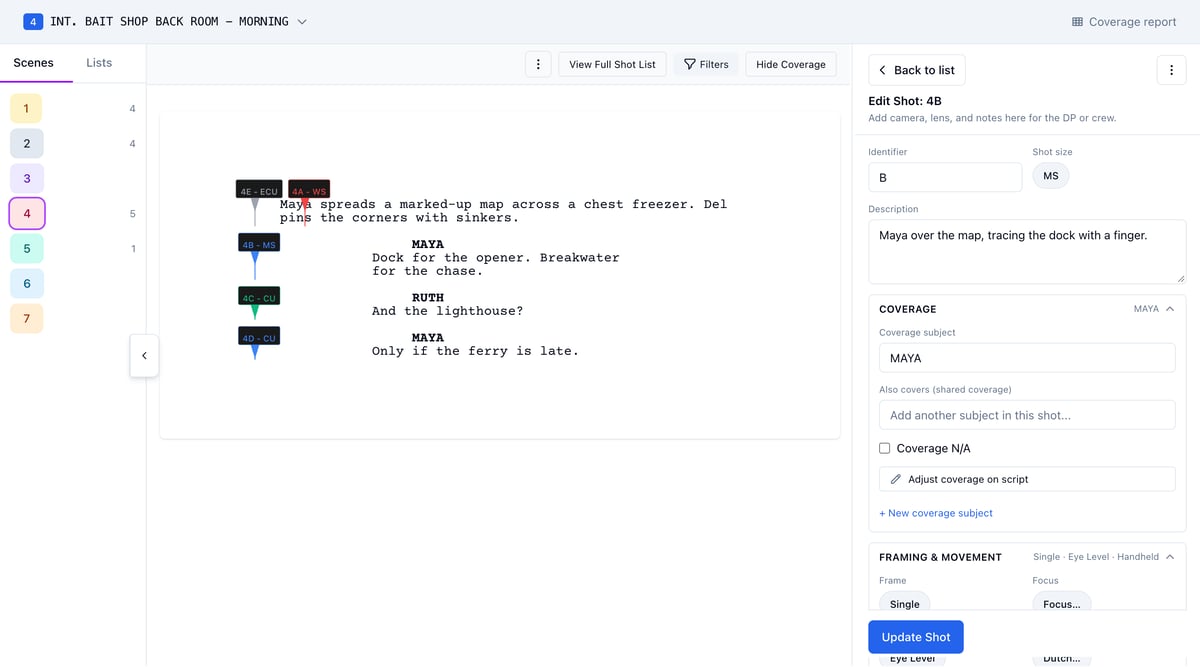
- Edit fields inside the Coverage, Framing & Movement, Camera & Lens, and Production groups. Each group’s header summarizes what is set inside it.
- Click Update Shot to save, or Back to list at the top left of the inspector to leave without saving.
Set or adjust a shot’s coverage line
When you open a shot in the inspector, the script shows only that shot’s line, so you can see which one you’re editing. Click Show all shots to bring the others back. Back to list brings them back too. To adjust a line you already have:- Drag the label at the top of the line to where the shot starts, or the circle at the bottom to where it ends.
- Click Save coverage.
- In the inspector’s Coverage group, click Mark coverage on script.
- Click in the script where coverage starts, then where it ends.
- Click Save coverage.
Credit more than one person with a shot
A two shot covers both people in it. In the inspector’s Coverage group, the primary Coverage subject drives the shot’s color; Also covers (shared coverage) adds credit for everyone else in the shot.- Click into Also covers (shared coverage) and pick a subject.
- Each added subject appears as a chip. Click a chip’s x to remove it.
- Click Update Shot.
Mark a master
A shot counts as the scene’s master when its purpose is Establishing (master) or its size is WS or EWS. In the entry row, typingmaster or wide in the Size cell resolves to WS.
Read the coverage strip
The strip above the shot list is the scene’s coverage scorecard.- The Master dot fills when the scene has an establishing or wide shot.
- Each subject dot fills when that person has at least one shot crediting them, primary or shared.
- Click a filled dot to show only that subject’s coverage lines on the script. Click it again to restore your filters.
