

Printing your shot list
Who can do this: Anyone who can open the shot list can print it, on every project and every plan. Changing which columns print needs project edit access, which the Free plan gives on your first project and Supporter on all.Paper still wins on a lot of sets. The Shot List PDF is a print of the View as you have it set up, so you decide what goes on the page before you press Export, not after. Find it under Visual → Shot List → View Shot List, then Export.
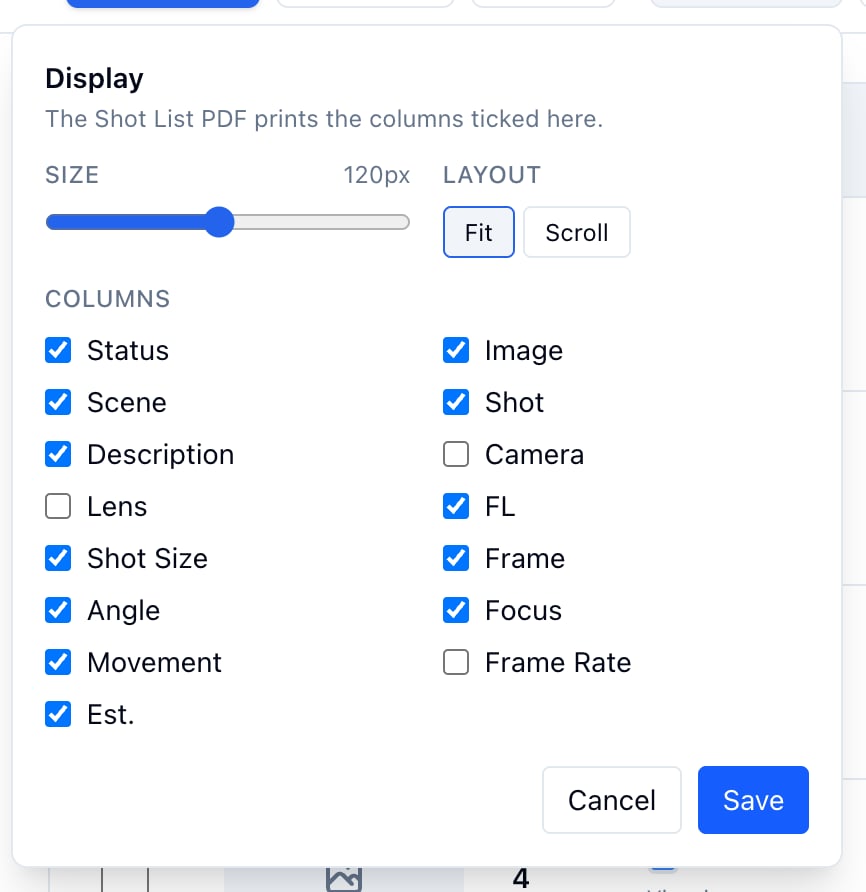
Choose what prints
- Click Display.
- Untick the columns the page does not need.
- Click Save.
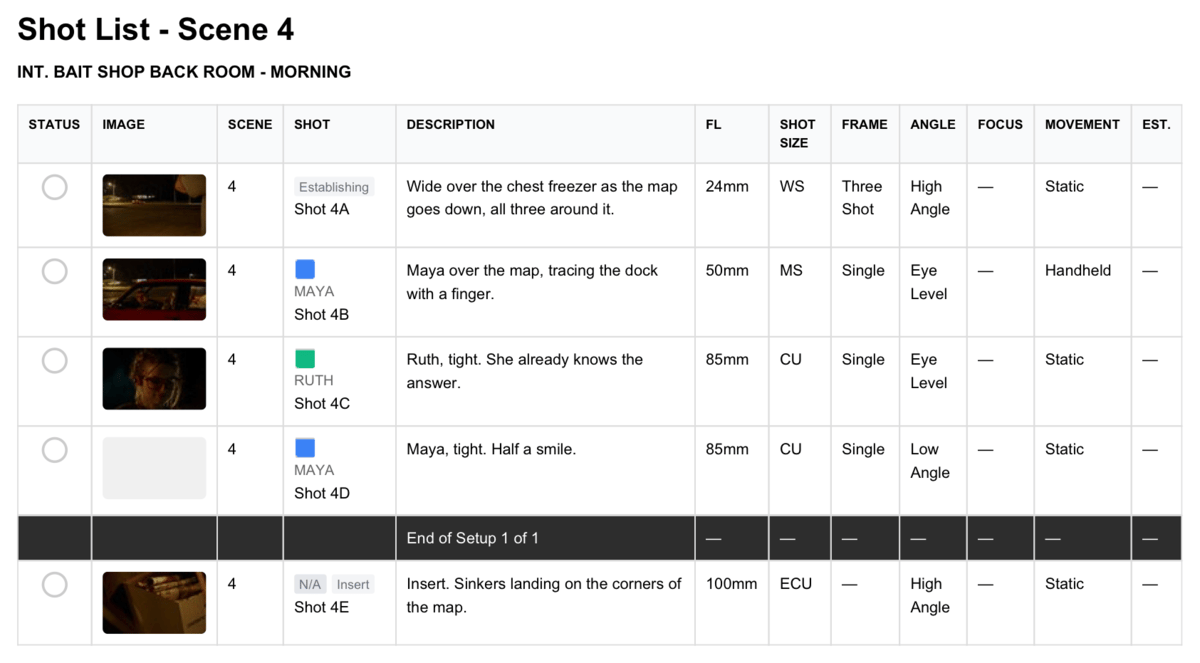
Print a scene as a table
- Open the scene in the View.
- Set View Type to List View.
- Click Export, then Shot List PDF.
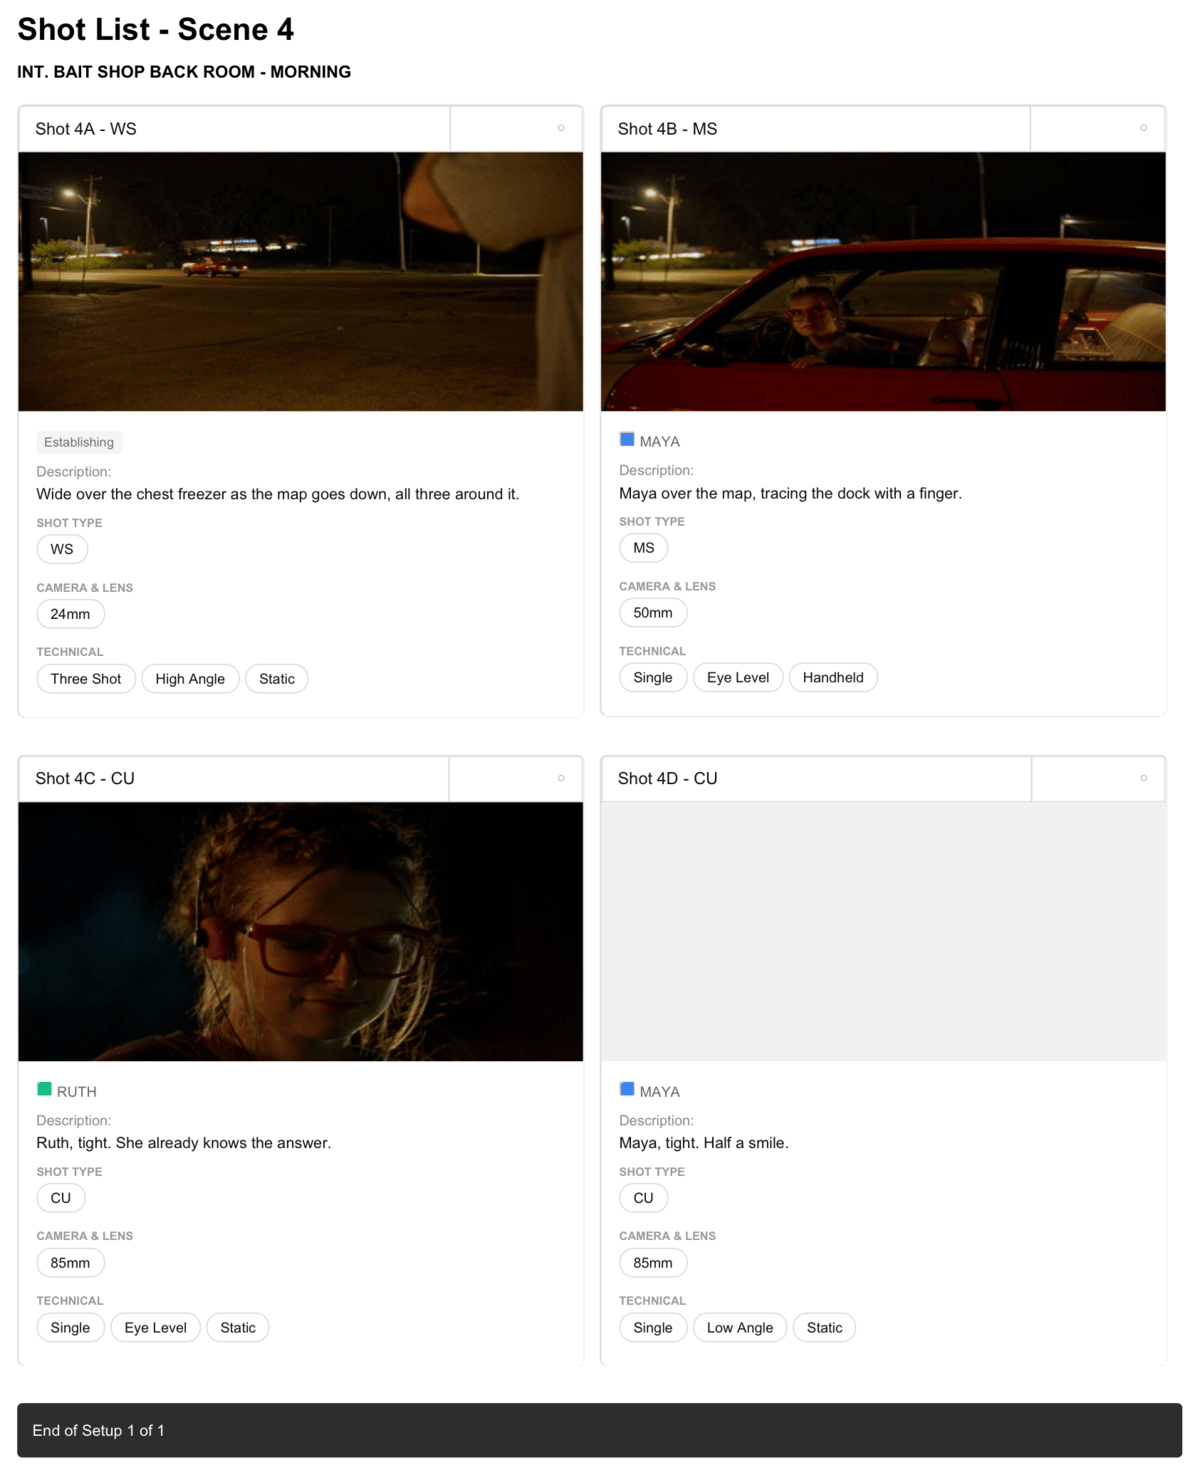
Print it as cards
- Set View Type to One Column or a column count.
- Click Export, then Shot List PDF.
Print a day or everything
- On All Shots, Export offers Shot List PDF (all scenes), every shot in script order.
- With a day picked in Shoot day, the PDF is that day, with its setups.