

How to build a shot list
Who can do this: Free plan on your first project, Supporter on all projects. Building shots needs project edit access; members with view access get the read-only shot list. The Builder is for desktop and tablet.A shot list gets built in three passes: call the shots against the script, add the camera details, then put the shots in the order you will shoot them. This page takes one scene through all three and points to the detail for each. Find it under Visual → Builder.
Open a scene
- Open Visual and click Builder.
- Click a scene in the left sidebar.
Call the shots
- Select the script text the shot covers.
- Type a Size, such as
wsorcu, and press Enter. - Press Enter on Angle and on Move to skip them, or fill them in.
- Type the character’s name in Subject and press Enter.
- Type a Description and press Enter.
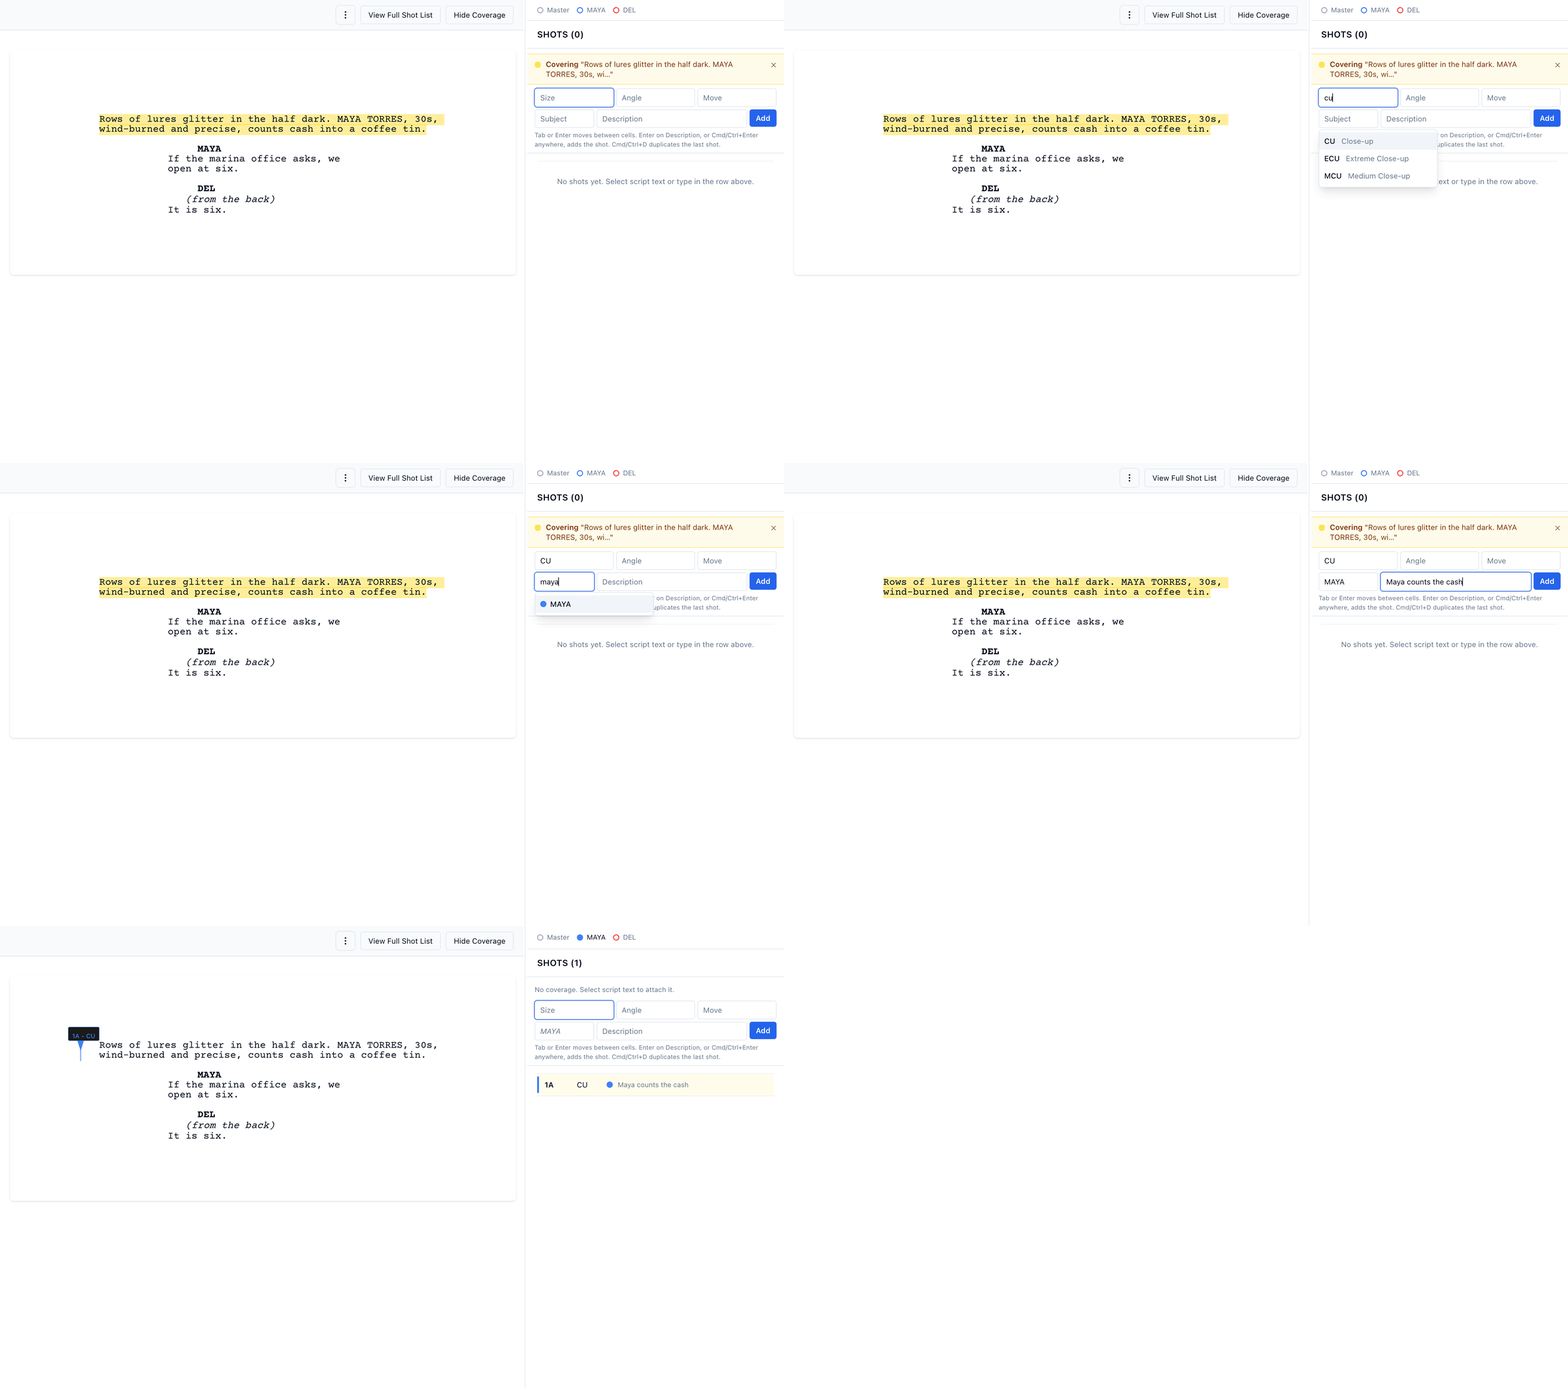
master in Size.
- To add a shot with no script text behind it, skip the selection.
- Press Cmd+D (Mac) or Ctrl+D (Windows) to copy the last shot as the next letter.
Check who is covered
The dots above the shot list are the scene’s scorecard. Master fills when the scene has a wide shot. Each character’s dot fills when a shot credits them. A hollow dot is someone the scene has no shot for yet.
Add the camera details
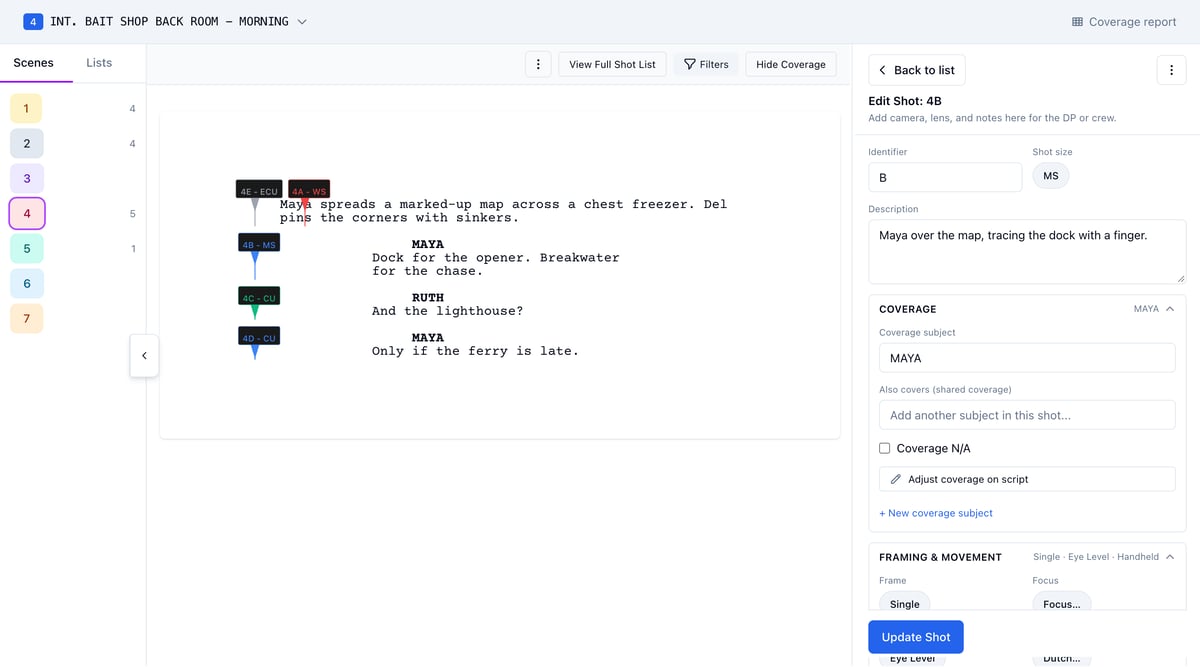
- Click a shot in the list.
- Open Framing & Movement, Camera & Lens, or Production and fill in what you know.
- Click Update Shot.
- Click Back to list.
Move to the next scene
- Click the next scene in the sidebar.
- Click the Lists tab and pick a shoot day to work through only that day’s scenes.
Put the shots in shooting order
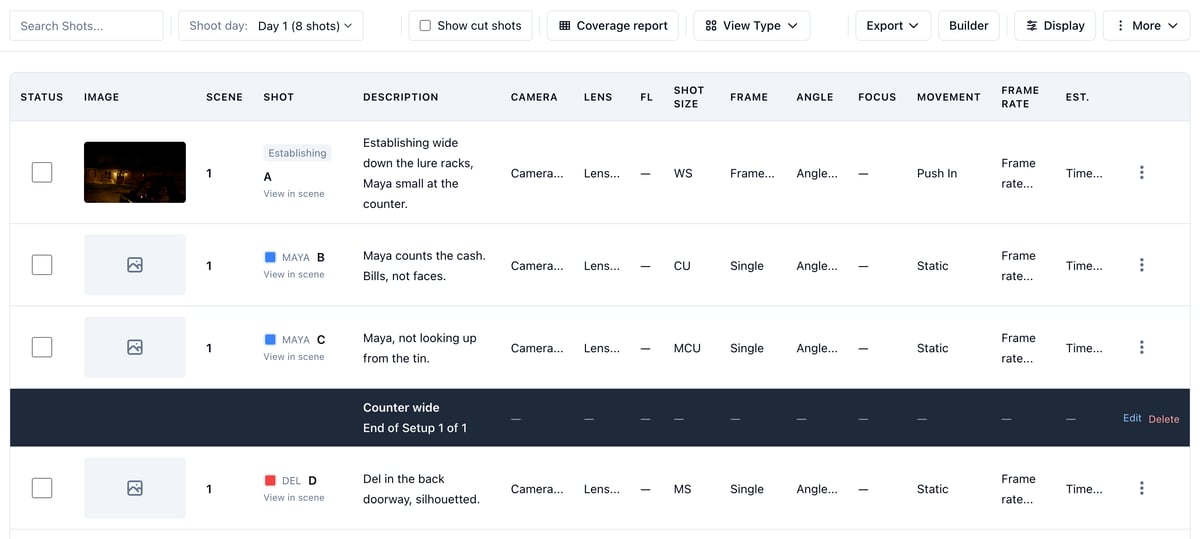
- Click View Full Shot List.
- Set Shoot day to a day.
- Drag the shots that share a camera position together.
- Open the row menu (the three dots) on the last shot of that group.
- Click Add Setup Under.
- Name the setup and click Add Setup.
Print it or share it
- Click Export, then Shot List PDF, to print the scene or day you have open.
- Open More and click Share to make a view-only link for crew who have no account.